The IoT Trigger element allows you to add triggers from external sources. For example a smart coffee machine could send a trigger to an avatar and the avatar tells the user that the coffee is ready.
To add an IoT Trigger element, right click on the white space in your frame and select 'IoT Trigger'.
Click on the element to open the sidebar. In the sidebar, you can view and copy the generated URL and auth token, add a transformation rule, and test the trigger.
Connect the IoT Trigger element to the element you want it to activate.
This works independently from the "Human detection" triggers.
Usage
If you want to send a request to your robot you can do it in the following way.
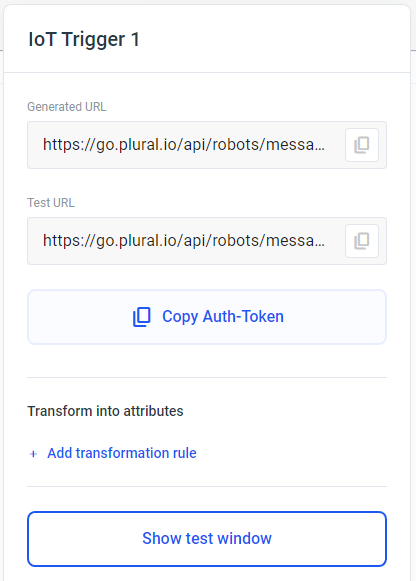
Here's what the IoT Trigger box looks like:
-
Generated URL: This is the endpoint that you should call to trigger you real robot.
-
Test URL: This is the endpoint that you should call to test the communication. Messages that you send here will be visible in the test window (click the "Show test window" button).
-
Copy Auth Token: copies the authorization token into your clipboard. Afterwards you can just paste it.
-
Add transformation rule: Here you can transform parameters from the request body into attributes that you can use in Plural. For a better understanding have a look at the "Usage example" further down on this page.
-
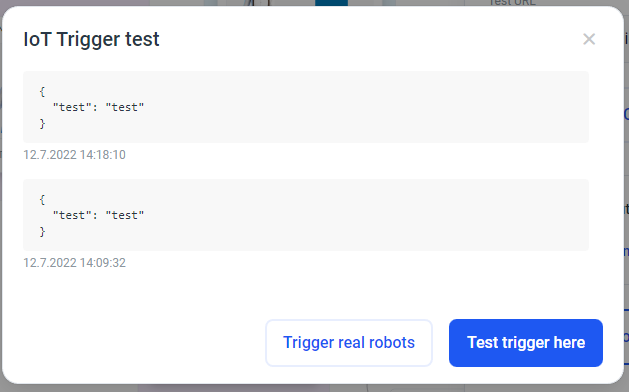
Show test window: opens a test window for you to test the IoT trigger. Messages that you send you the "Test URL" will be displayed here. You can also send test messages from the two buttons in the window.
Usage example
Let's say you want to tell your robot that it should go to a specific location. Here's one example of how you could do this with the IoT Trigger element.
Here's in general how the API call should look:
-
URL: the URL from Plural
-
Headers:
-
Name: "Authorization"
-
Value: "Token <YOUR_TOKEN>"
-
-
Body: application/json
Build your API request
Let's say you are using Postman.
-
First let's add the "Test URL" into the URL field of Postman.
-
Then let's add a Header called "Authorization"
-
For the value of this Header copy your Auth Token with the button in Plural and write "Token <YOUR_TOKEN>" into the value field (replace <YOUR_TOKEN> with the actual token that you copied)
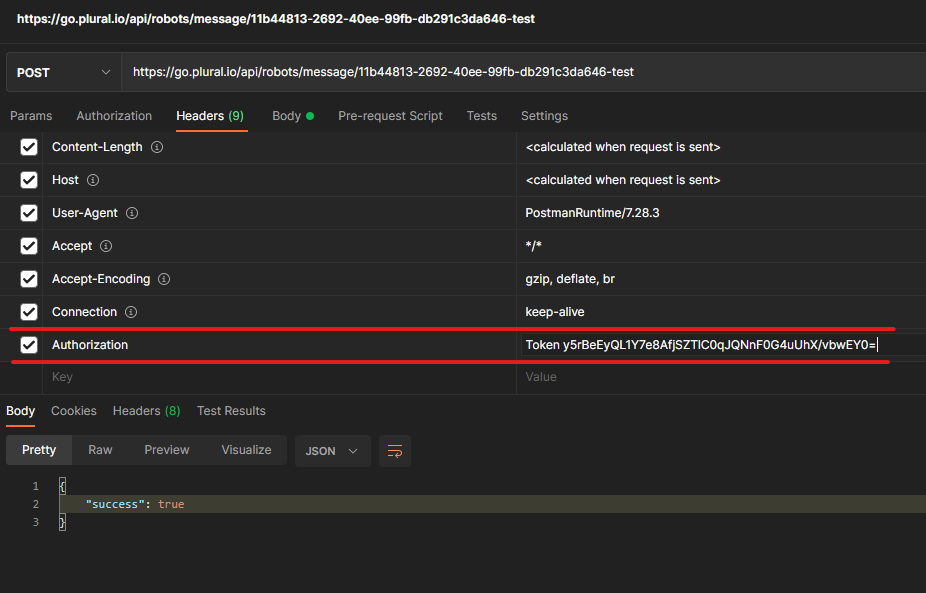
- Add a JSON body to your request (e.g.: { "goToLocation" : "Meetingroom" } )
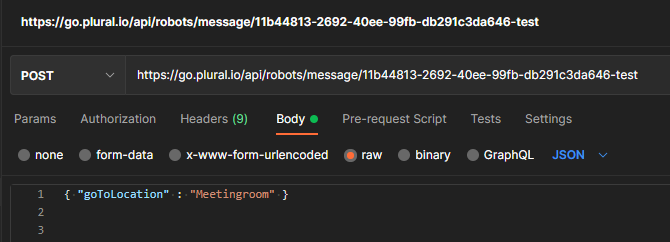
-
Hit the send button
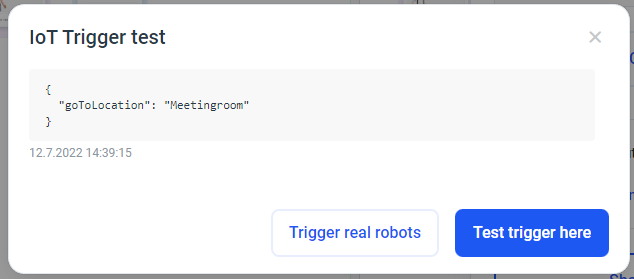
-
You should now see the incoming message in the "Show test window" window.
That's where the "Add transformation rule" gets in handy.
If you want to use the "goToLocation" parameter that we are sending to the robot inside the Plural application you can save it into an attribute. To do enter the name of the parameter (in our case "goToLocation" from the request) and choose which attribute you want to save it into:
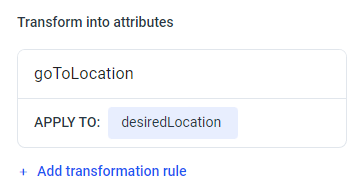
Now you have saved the location to the attribute "desiredLocation" and can use this attribute further on in your flow!
IoT Trigger in Plural Automation
Trigger an automation by using an API call to trigger an IoT trigger as the start of an automation.
The IoT Trigger can also help you debug your automation, to do this open the IoT Trigger sidebar and click 'Show Test Window', leave the test window open while you trigger the IoT Trigger and you will see the logs from your automation.
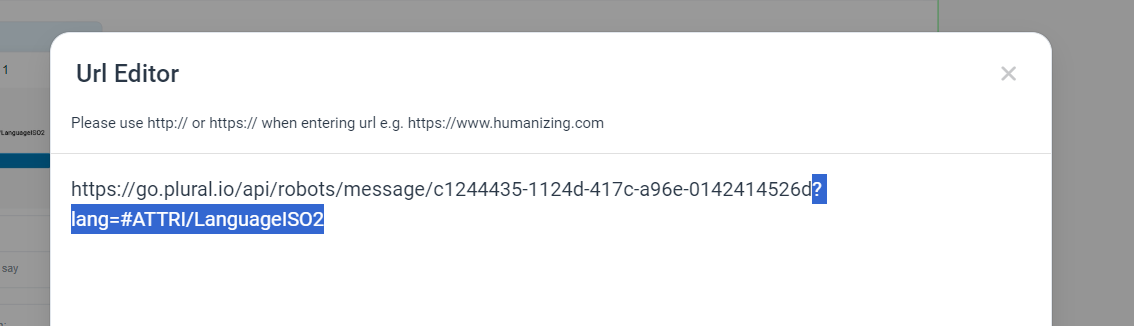
Use the Language parameter to trigger and run the automation in a specific language. This is important for the Plural Knowledgebase for example:
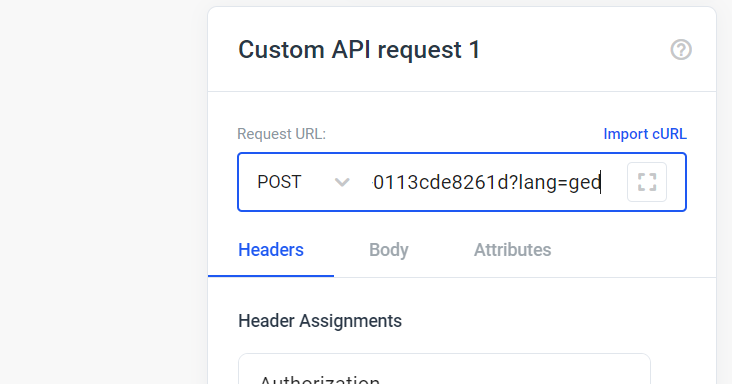
If you always want to trigger the Plural Knowledgebase in the current project language in an automation frame, you can use the system variable '#ATTRI/LanguageISO2' as the value of the lang parameter in the URL of the API call to trigger automation.
This documentation will guide you on how to call a webhook with a specific session ID. This process allows you to trigger actions for an avatar associated with a particular session.
The webhook URL you need to use is the same as before, but you will append the session ID as a query parameter. For example:
https://dev.plural.io/api/robots/message/2357c733-aeb3-4854-a525-72b084047f50?session=<active_session_id>
Copy
Replace
<active_session_id> with the session ID you want to target.Before calling the webhook, you need to know the session ID of your run. Our recommendation is to send it from Plural to your application at the start of each flow run. It may be helpful to display the session ID on a media slide or note it down while testing. Note that the session ID changes for each flow run.
Expected Outcomes:
-
When it should run: When you call the webhook with the correct session ID, it should trigger the desired action for the avatar associated with that session.
-
When it should not run: If you call the webhook with an incorrect or wrong session ID, it should not trigger any action.
-
Without session parameter: If you call the webhook without providing any session parameter, it will run on all active Avatars with that project.
Make sure to replace
<active_session_id> with the actual session ID you obtained in Step 2.By following these steps, you can effectively call the webhook for a specific session ID and control the actions performed by your avatars.
Authenticate without Authorization Header
Simply pass the auth as url parameter to the request url
https://dev.plural.io/api/robots/message/ebff59e1-a52c-4e4b-8500-287e5a8ba630?auth=YOUR_AUTH