To use Plural Automation and follow this article, it is recommended that you are familiar with API calls and basic scripting. It would be advantageous if you have already worked with automation tools such as Microsoft Powerautomate or Pipedream.
Add elements to the Plural Automation frame as you are used to by right-clicking on the white area, e.g. add a custom script element or an API call element.
Communicate between the server frame and avatar frame
There are two ways of communicating between the frames: 1) Using the IoT trigger element 2) Using the robot-to-robot command element.
Add an IoT trigger that waits for the avatar to send a trigger via the API Call element and vice versa.
Example: API call from Avatar Frame to IoT Trigger from Plural Automation Frame
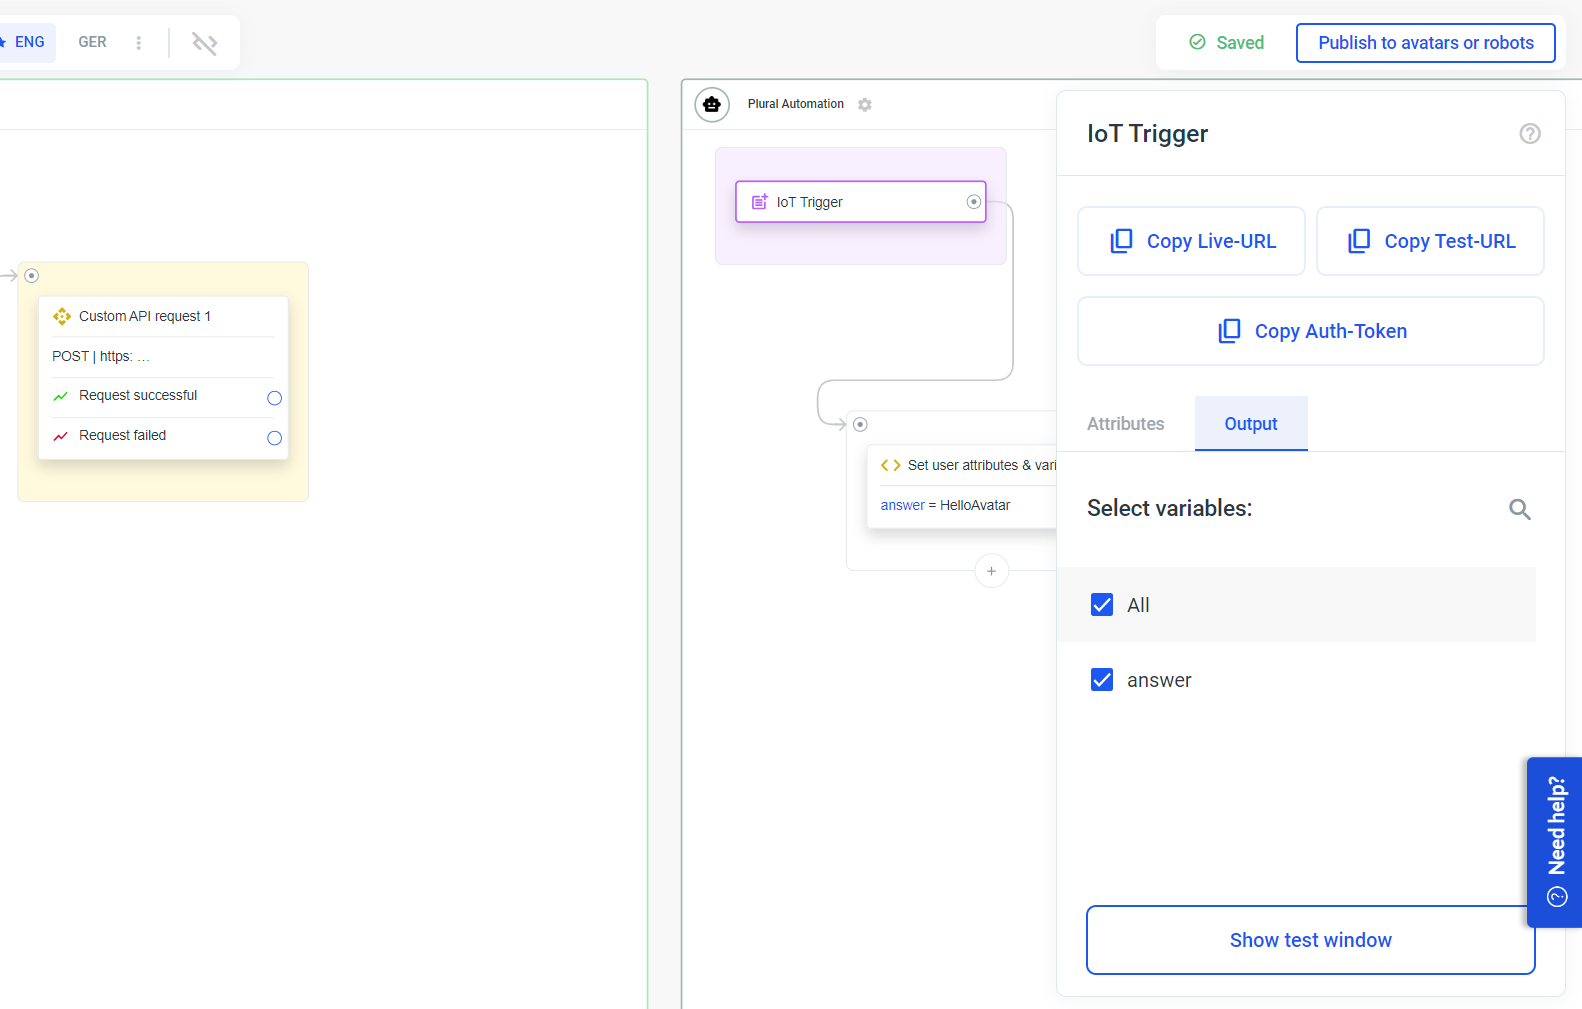
In this particular example, the Plural Automation frame has an IoT trigger that, when triggered, sets a variable ("answer"="Hello Avatar").
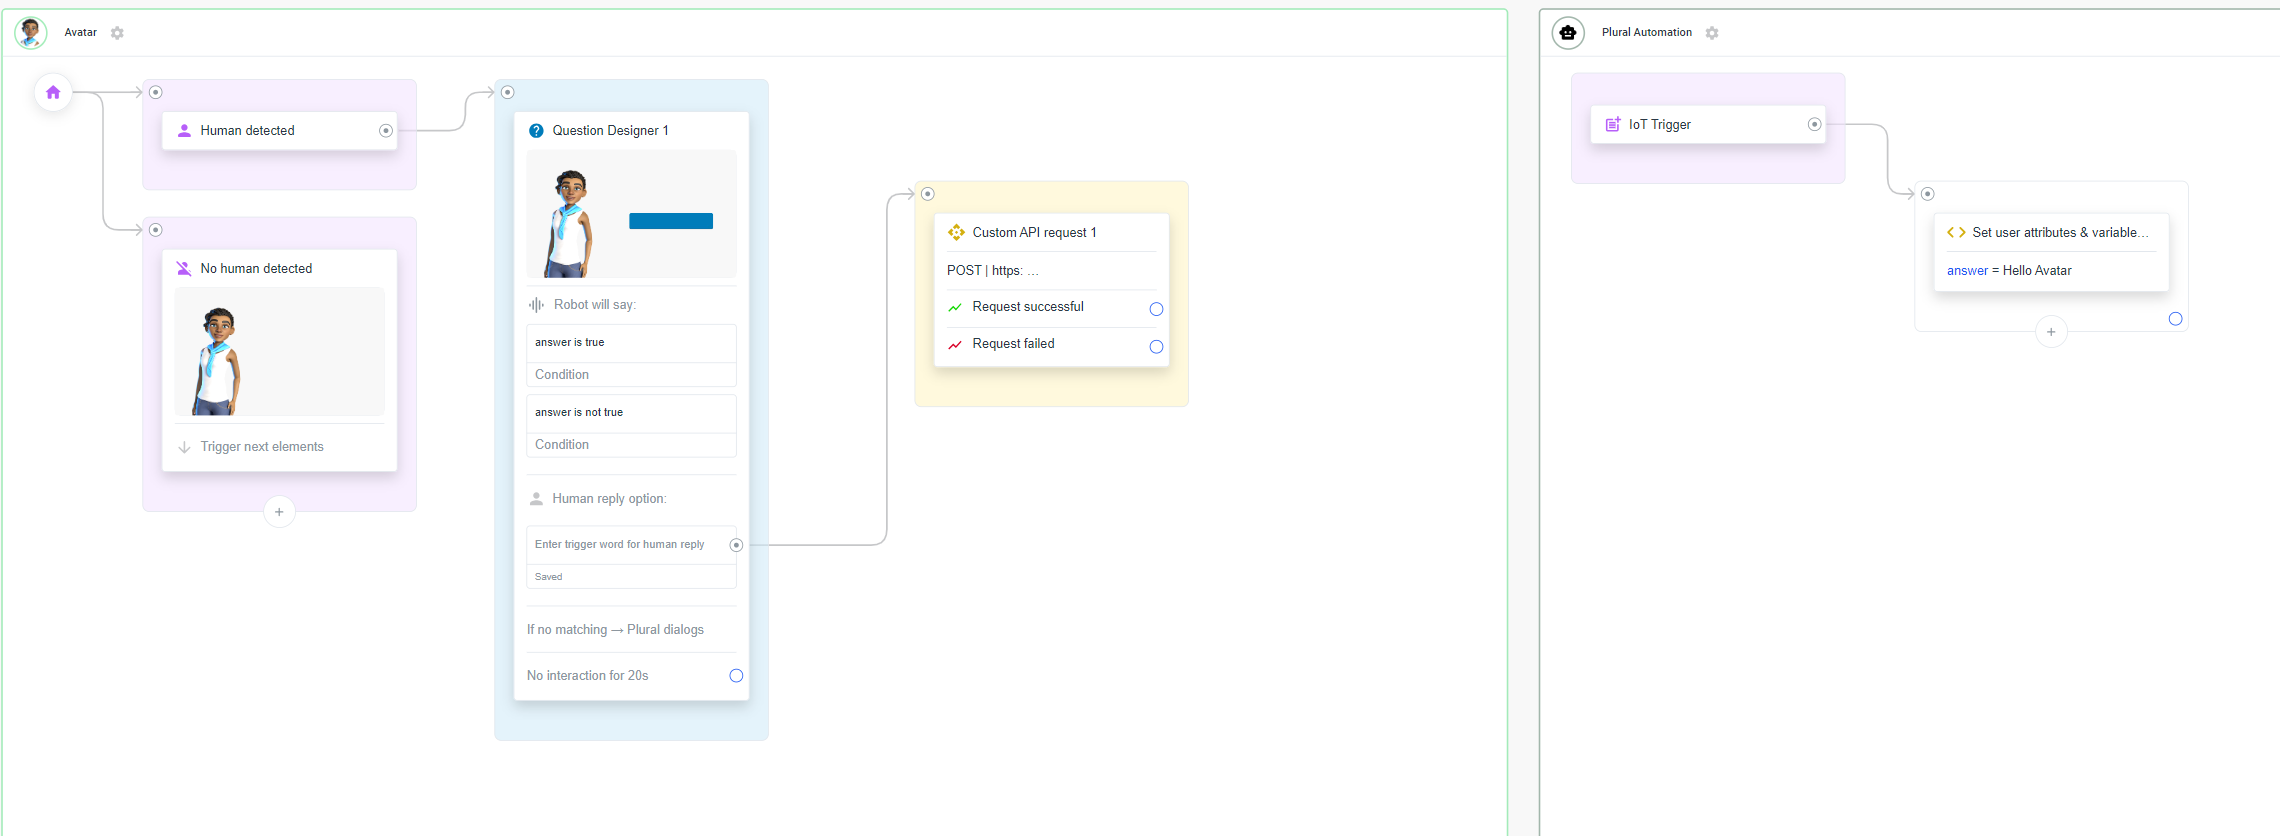
Setting up the custom API request element in the Avatar Frame
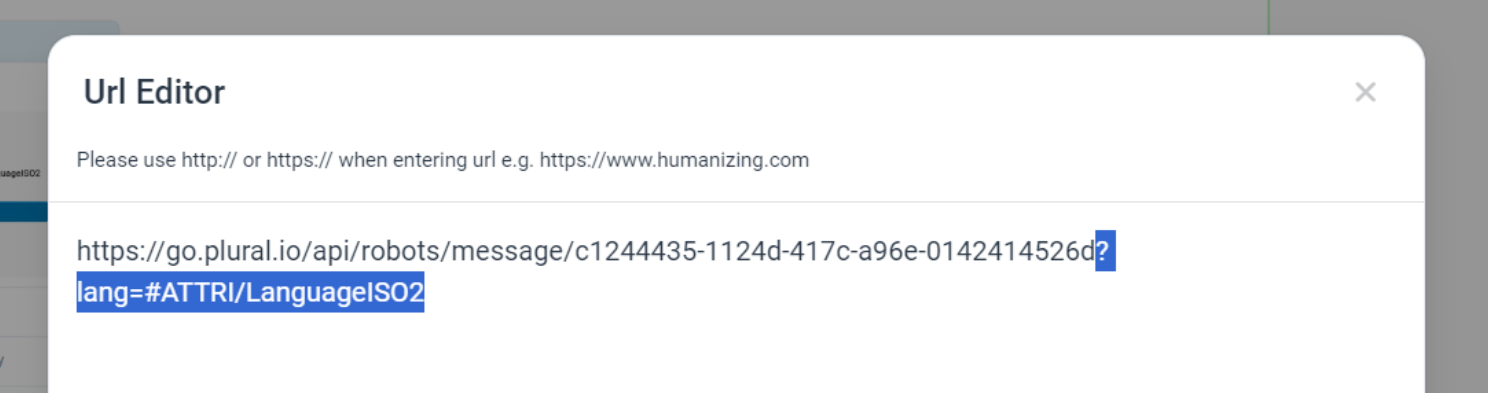
If you want to trigger a knowledgebase in your automation frame, it is important to add a language parameter so that the knowledgebase knows which language to answer in.Add '?lang=#ATTRI/LanguageISO2' to the URL in the API call to always specify the current project language.Please read on here: Handling of multilingual automation frames
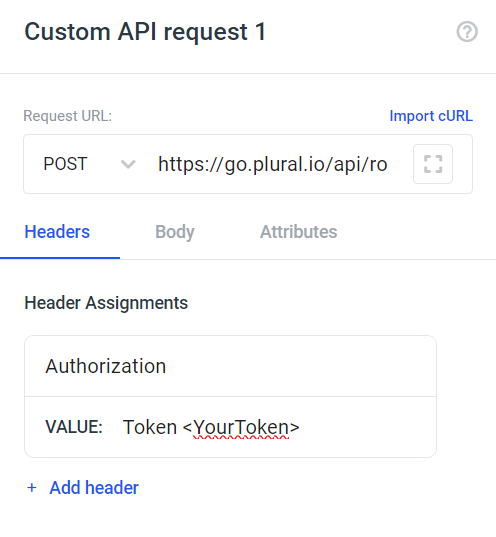
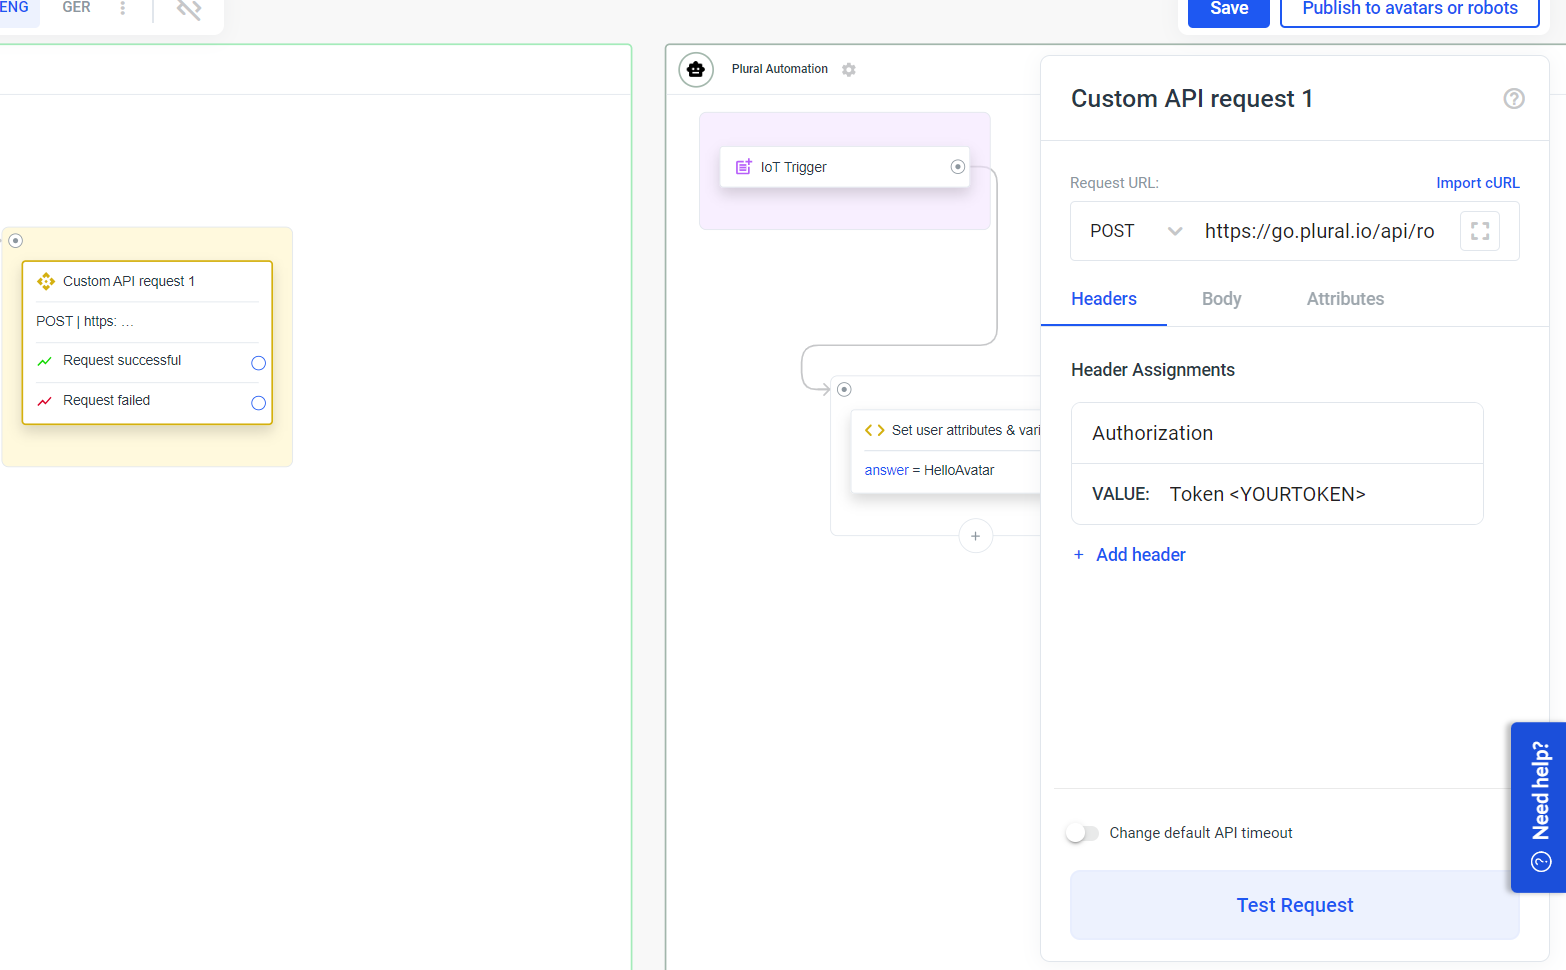
For the API Call in Avatar frame, you can get all the information by clicking on the IoT Trigger in the Plural Automation frame, which opens the sidebar, and clicking on the buttons (Copy Live URL, Copy Test URL, Copy Auth Token). Then open the sidebar of the API Call in Avatar frame and paste the information:
In the Header Assignments, add 'Authorization' and 'Token', then paste the token you copied from the IoT Trigger element.
To retrieve the variable "answer" from the plural Automation Frame, open the IoT Trigger and check the variable on the 'Output' tab:
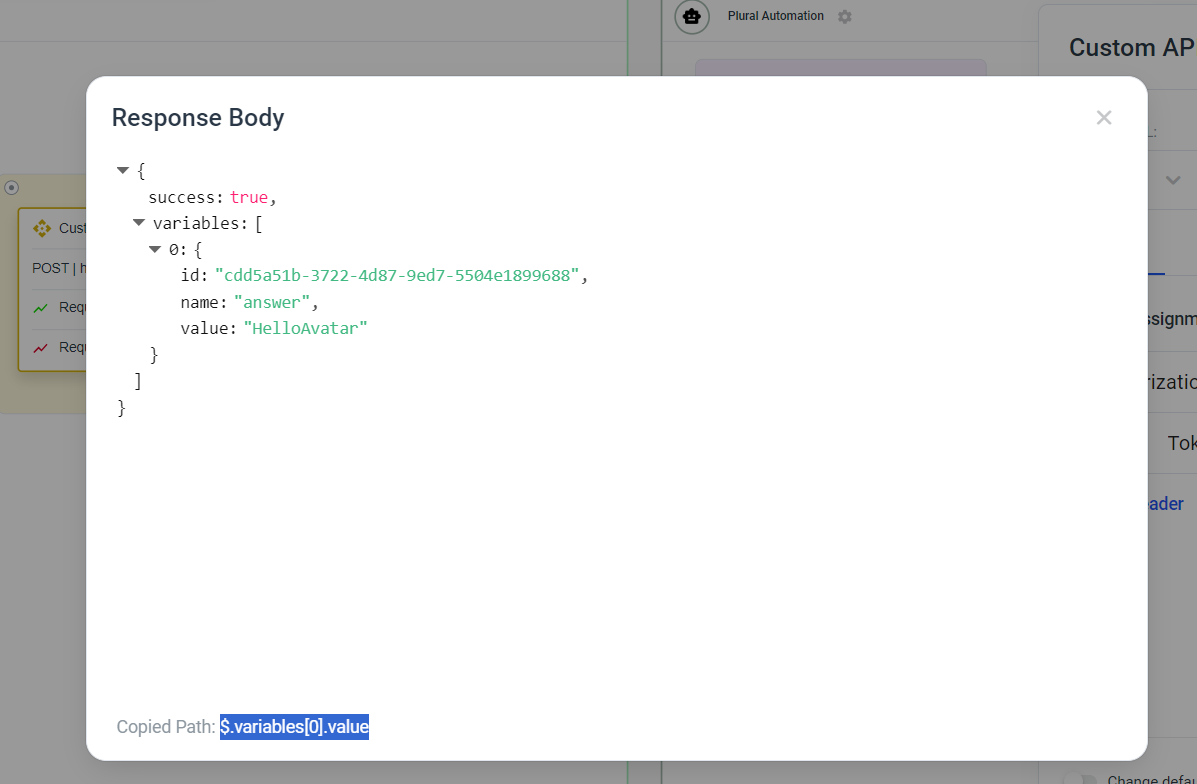
In the API Call from the Avatar Frame use the 'Test Request' button to see what the IoT Trigger sends you back:
Then select your value and copy the path below:
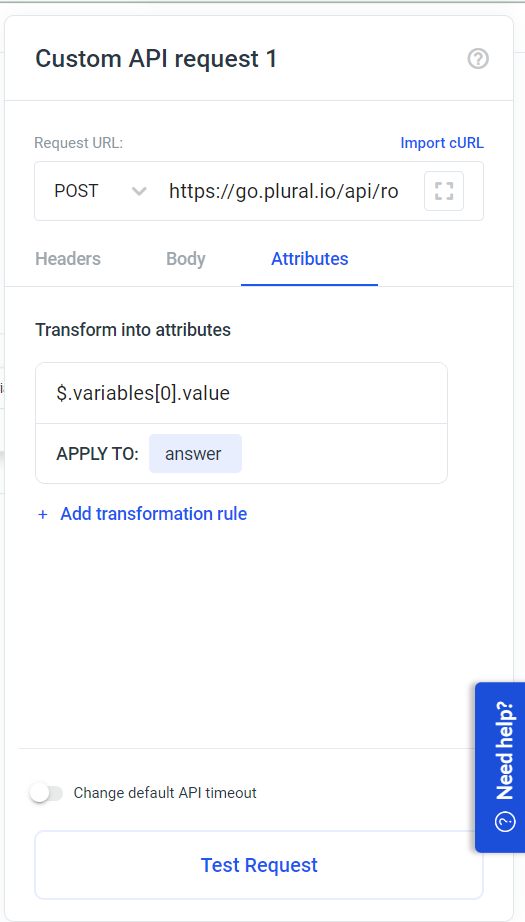
In the sidebar of the API Call element, switch to "Attributes" and enter the path and a variable name:
You can now use the 'variable' variable from Plural Automation in the avatar frame.
Add a robot-to-robot command element to your avatar frame and connect the output to an element from the Plural Automation frame.
In this particular example, we send a command to a Plural Automation frame using the robot-to-robot command element. The Plural Automation frame sets the value of the variable "answer" to "Hello Avatar":

Make sure you select the variable in the Output tab of the robot-to-robot command to get the response of the avatar frame.
If you want to pass a variable from the avatar frame to the plural automation frame select the variable in the Input tab. Do the same if you want to send a variable from the plural automation frame to the avatar frame without it explicitly waiting for it.
At this stage, the only element in an automation frame that requires the language parameter is the Knowledge Base.
What to do?
When you enter the URL in the API call, e.g. in an avatar frame, in the Custom API Call request element, add the suffix '?lang=#ATTRI/LanguageISO2'´to the URL. This will pass the current language of your project. If you are not using plural to trigger the IoT trigger, or you want to pass a specific language, you could add '?lang=eng' for English or '?lang=ged' for German. The language must be in iso2 language code format.
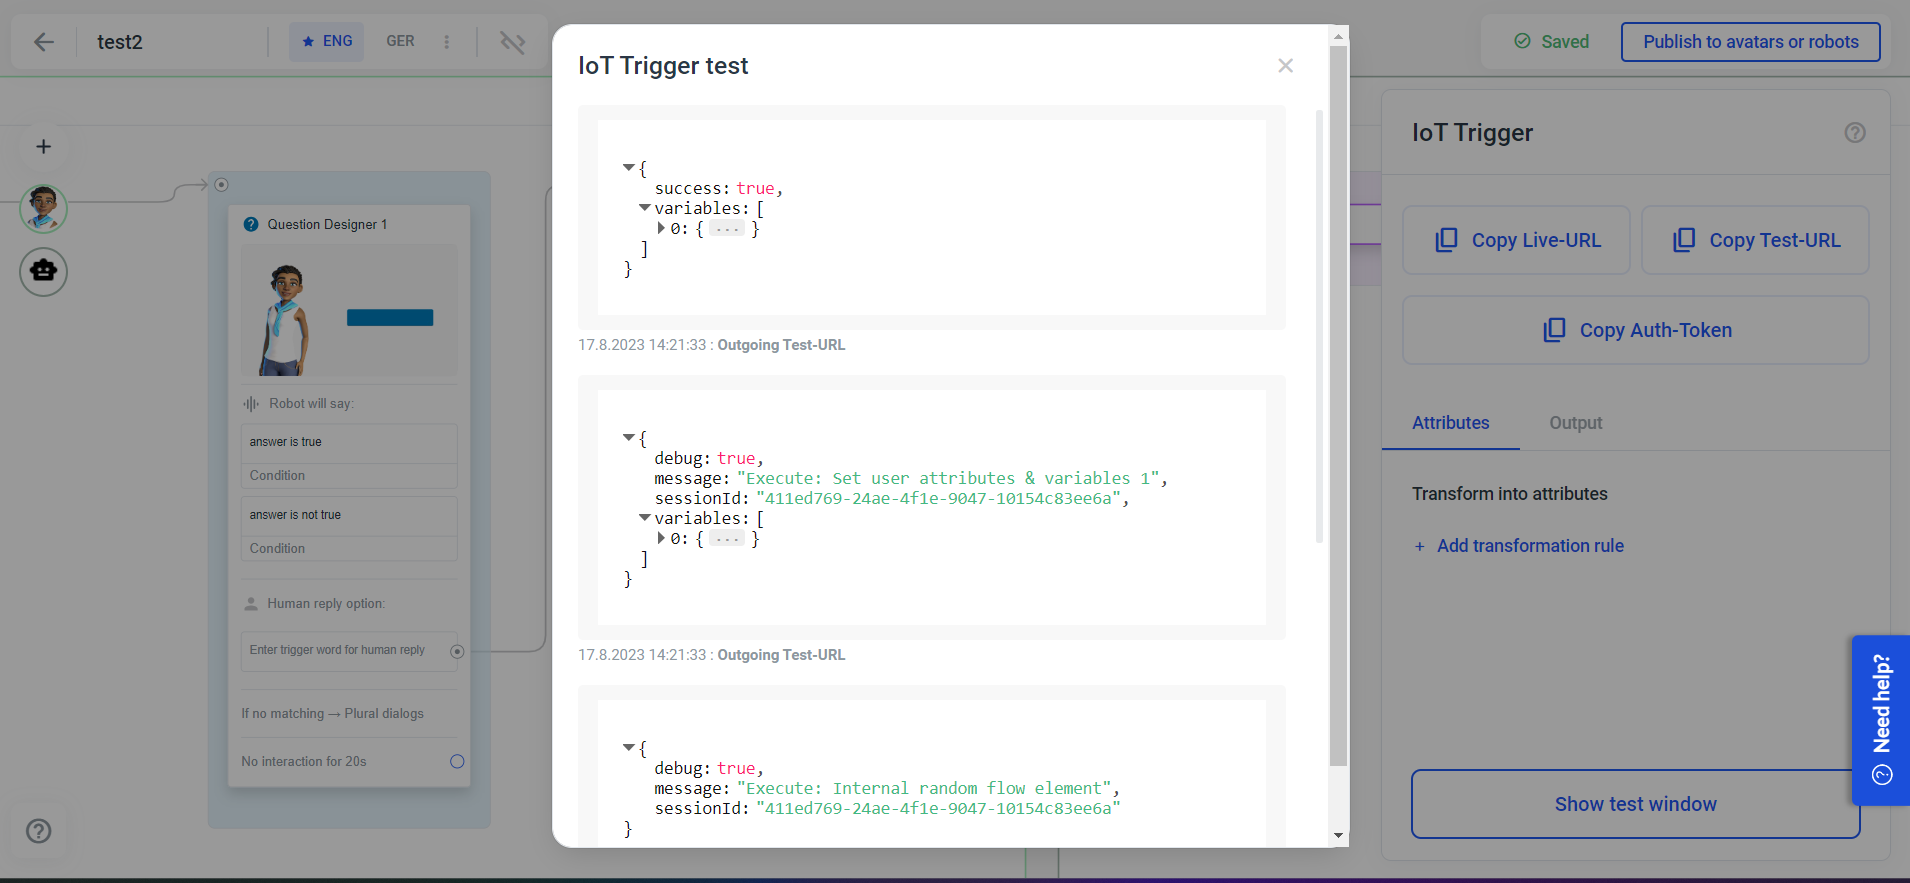
Open the IoT Trigger sidebar in the Plural Automation frame and copy the test URL and use the test URL in your API call that you use for the trigger. Then open the test window by clicking the 'Show Test Window' button. Once the IoT trigger is triggered, you will see detailed information about the flow:
Note that Plural Automation frames will only run when you have GOs in your account.