This page is still under construction.
The "Custom Script" element allows you to add custom JavaScript code to your flow. You can pass attributes to the script and back to the flow using the
getVariable() and setVariable() functions.Do this by calling the
getVariable('nameOfYourAttribute') function.This function allows you to pass attributes from the flow to the Custom Script element. You can use this function to access data that you've collected in previous elements of your flow, such as text inputs, button selections, or ratings. If you have an attribute inside your flow and you want to pass it to the "Custom Script" element, you can do so by calling the "getVariable()" function inside your script. Once you have the data in the Custom Script element, you can use JavaScript to manipulate it or perform other operations.
// getVariable expects one parameter as a string: the name of your Attribute.

getVariable('nameOfYourAttribute')
// so if you want to get the value of the Attribute "favoriteWine" you would call:
getVariable('favoriteWine')
Do this by calling the
setVariable('variableName', value) function.This function allows you to pass attributes from the Custom Script element back to the flow. You can use this function to send data that you've generated or manipulated in the Custom Script element back to use it in other elements in your flow. For example, you might use this function to update an attribute with the results of a calculation for later use.
// setVariable expects two parameters.
// 1) the name of the attribute and 2) the value that you want to save in there:
setVariable('variableName', value)

// so if you want to save the value of updatedName inside your script
// to the Attribute "avatarName" you could call the function like this::
setVariable('avatarName', updatedName)
Examples to get you started
Here are some examples that should help you to understand how to use the "Custom Script" element.
Let's say we want to build a simple counter in Plural. The following tutorial will be based on this flow right here:
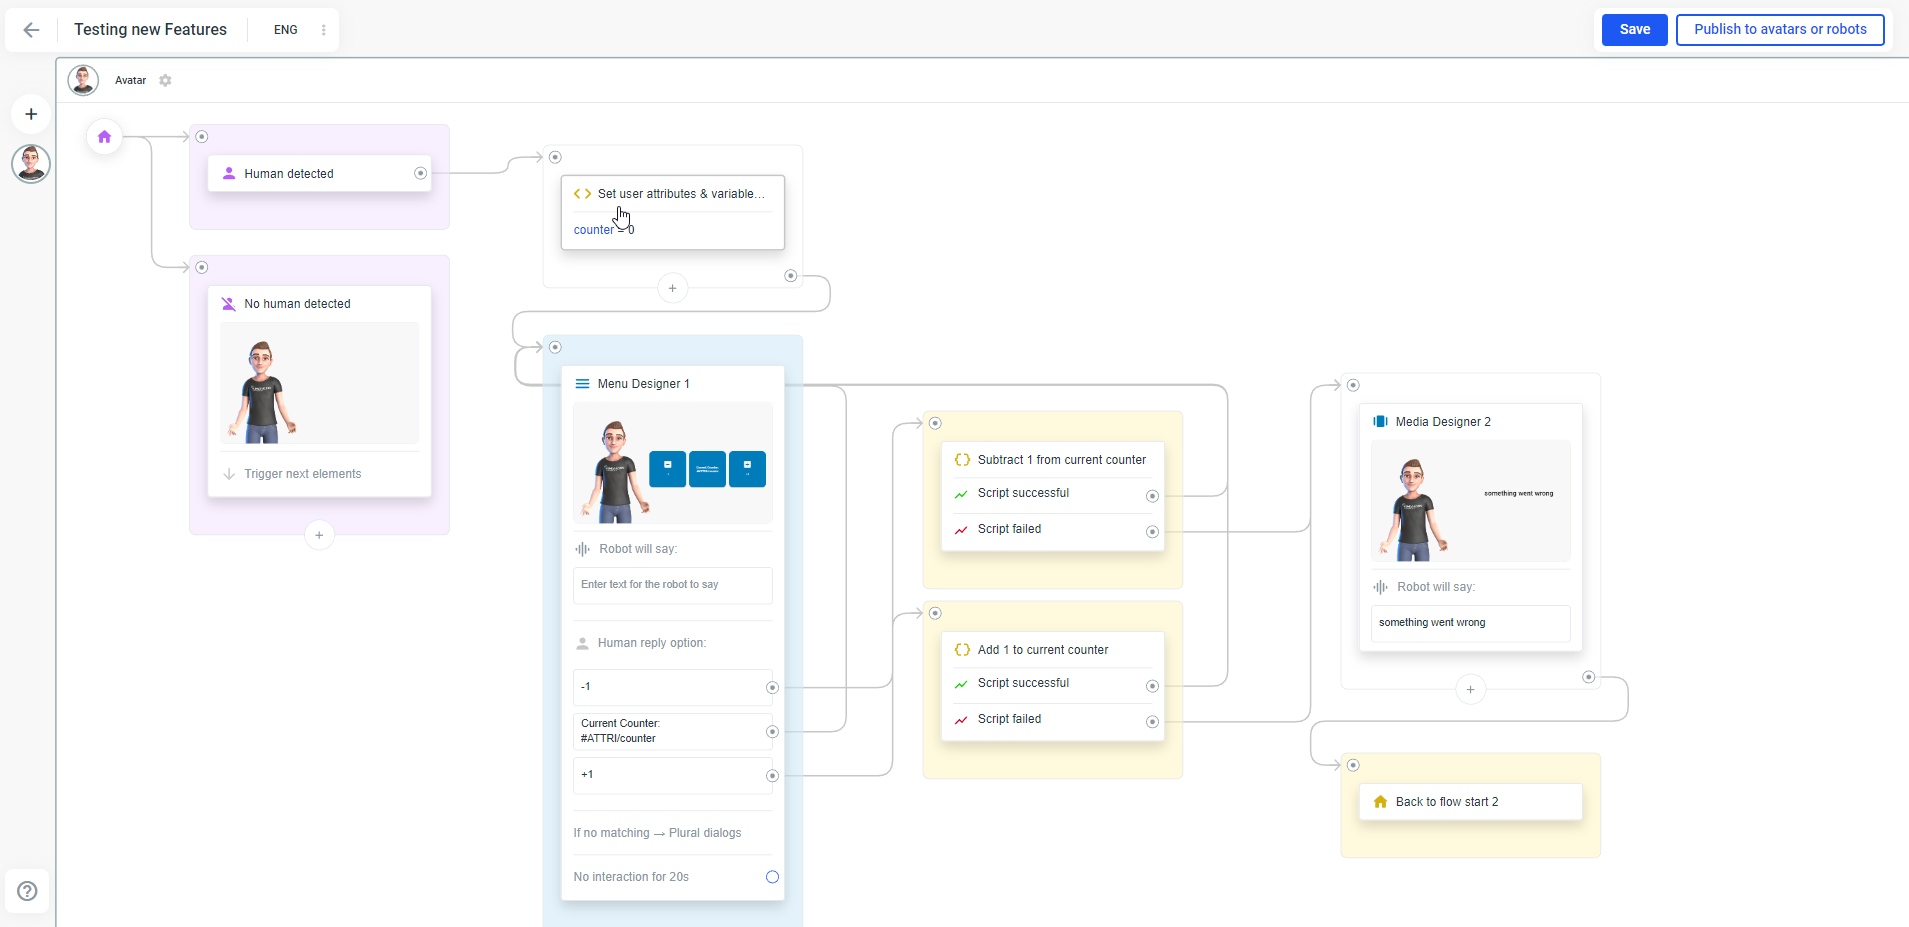
Plural "Counter" Flow.
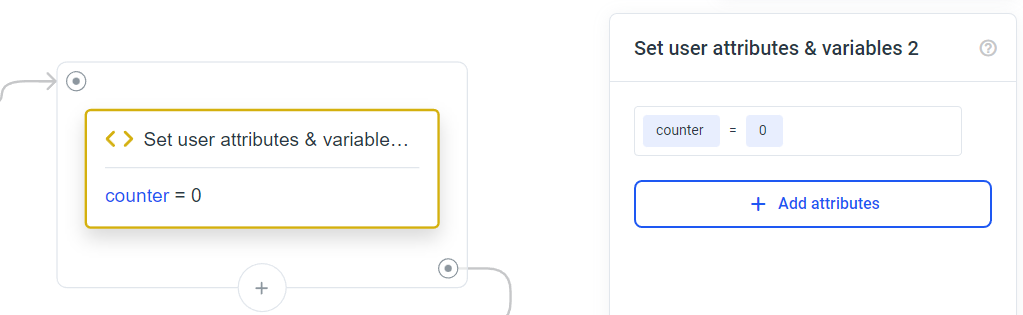
1) Initialize the counter attribute
At the start of the flow, let's initialize the counter with the value 0. Use a set attribute element, create a new attribute "counter" and give it the value 0.
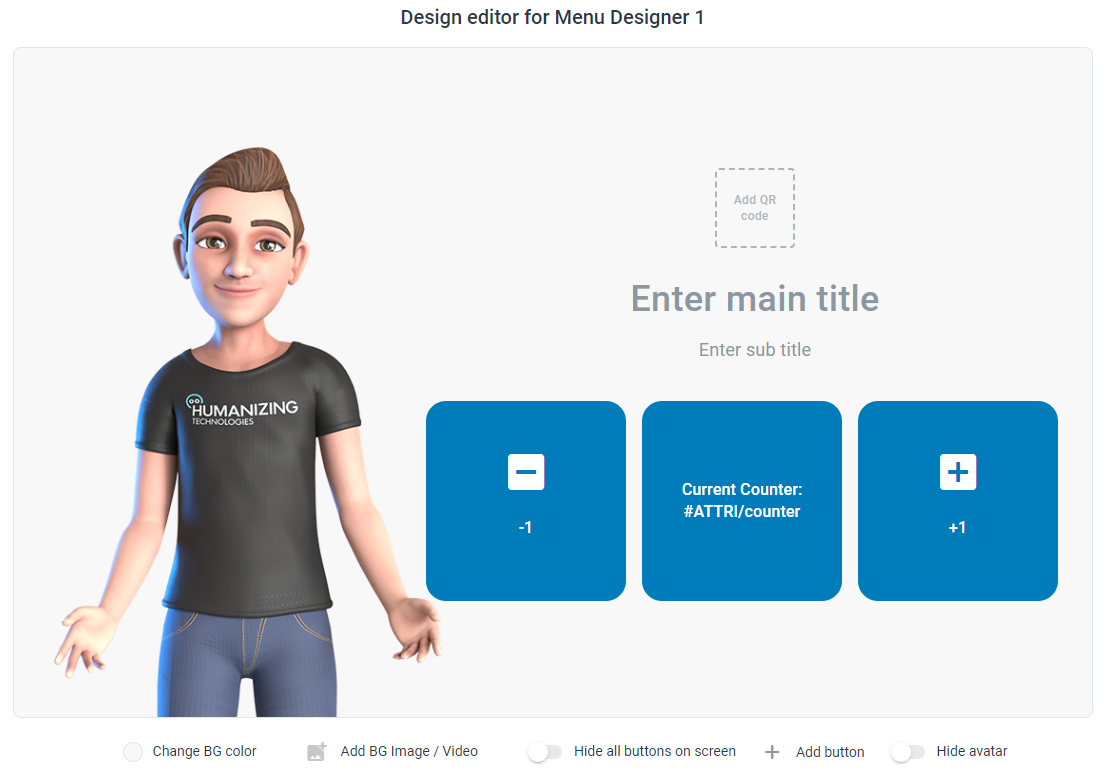
2) Create a Menu to count up/down
Next, let's create a menu with three buttons. One button to count up, one to count down, and one to display the current counter value.
3) Add two "Custom Script" elements
Next let's add the two script elements to count up/down. A note on the side here: of course, there are many ways to build this counter, this is just one of the possibilities.
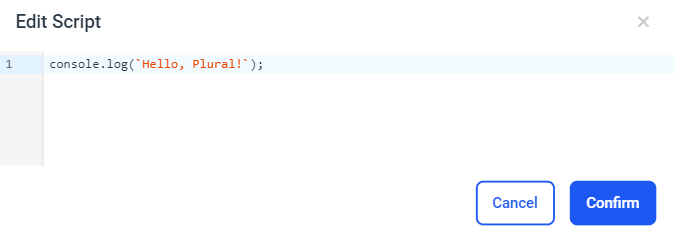
Add a "Custom Script" element to your flow. Click on it and the sidebar will open. Click on "Open script editor" and the fullscreen script editor should open. Now your script editor should look like this:
You can copy paste this code right here into the editor:
let currentCounter = getVariable('counter') // get the current counter value
let newCounter = parseInt(currentCounter) + 1; // parse the counter into an Integer and count up
setVariable('counter', newCounter) // set the value of newCounter to the attribute in the flow
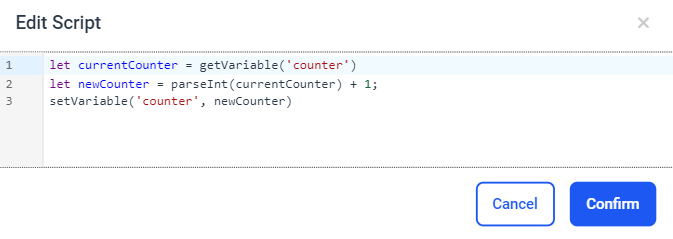
Then your script editor should look like this:
Explanation of what we just did:
First, with the
let currentCounter = getVariable('counter') we want to get the current counter value from the attribute inside our flow. We do so by saving the value of the attribute into our "currentCounter" variable in the script editor.Secondly, with the
let newCounter = parseInt(currentCounter) + 1; we create a second variable in the script called "newCounter". We assign this variable the value of the "currentCounter" variable above and add 1 to it. Note: to make sure "counter" is actually a number we parse it as Integer.Last, with the
setVariable('counter', newCounter) we assign the value of our "newCounter" variable in the script to the counter attribute in our flow.
To count down, you can follow the steps shown in the GIF above. The faster way is to duplicate the "Custom Script" element that we just created and just change the + to a - in line 2.
4) Add a "Something went wrong" slide
Add a Media Designer element that handles the case that something went wrong inside your script. Connect the corresponding outputs with the input of this media slide.
5) Test your flow
If everything went well, you should now have a flow that is able to count the counter up or down. For help wiring the boxes together look at the picture at the start of this example.