Prepare your Philips Hue system to receive commands from your robot/avatar.
Step 1: Make sure your system is working
Make sure your Philips Hue bridge is connected to your network and working properly. Test whether the smartphone app can control the lights on the same network.
Step 2: Find the IP address of your Philips Hue bridge
Everything is working – Go to the settings menu in the app. Go to “Hue Bridges.” Select your bridge. The IP address of the bridge will be displayed.
Step 3: Open the test page in your browser.
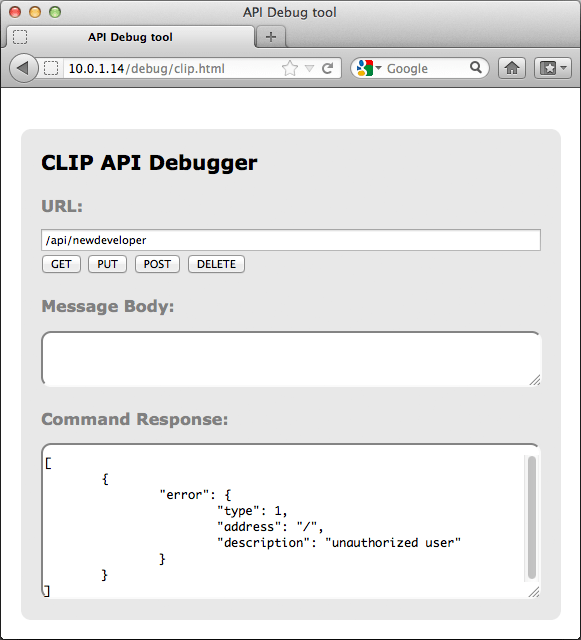
Follow this link: https://ip_address_of_your_bridge/debug/clip.html (This debugger utility allows you to populate the components of an HTTPS call – the basis of all web traffic and hue's RESTful interface.)
URL
/api/newdeveloper
Method
GET
You should see a response like the following:
Step 5: Create an authorized user
Fill in the following information, but read on before clicking the “Submit” button.
To pick up a draggable item, press the space bar. While dragging, use the arrow keys to move the item. Press space again to drop the item in its new position, or press escape to cancel.
URL: /api
Body: {“devicetype”:“my_hue_app#iphone peter”}
Method: POST
This command basically tells you to create a new resource within /api (where the user names are located) with the following properties. “my_hue_app#iphone peter” can be replaced with any user name of your choice.
Before clicking the “POST” button, press the button on the bridge and then the button. A success message like the following should then be displayed.
To pick up a draggable item, press the space bar. While dragging, use the arrow keys to move the item. Press space again to drop the item in its new position, or press escape to cancel.

Step 6: Second attempt
If you try step 4 again with your newly created user “1028d66426293e821ecfd9ef1a0731df,” you should see a result this time:
URL: /api/1028d66426293e821ecfd9ef1a0731df
Method: GET
Step 7: Light control
From now on, you can control your lights via the network using the API calls including your new user. Here are some examples. To get a list of all available Philips Hue lights:
Address: https://<bridge ip address>/api/1028d66426293e821ecfd9ef1a0731df/lights
Method: GET
Make a note of the numbers of your lights so that you can control them later. For example, this command changes the status of your light 1 to “off”:
Address: https://<bridge ip address>/api/1028d66426293e821ecfd9ef1a0731df/lights/1/state
Body: {“on”:false}
Method: PUT
This changes the status of your lamp 1 to “On” and sets some values, such as the saturation (intensity) of the colors and the brightness, to the maximum by setting the resources “sat” and “bri” to 254. Finally, we instruct the system to set the “hue” (a measure of color) to 10000 points (the hue ranges from 0 to 65535):
Address: https://<bridge ip address>/api/1028d66426293e821ecfd9ef1a0731df/lights/1/state
Body: {“on”:true, “sat”:254, “bri”:254,“hue”:10000}
Method: PUT
Step 8: Time to test the connection between your robot/avatar and Philips Hue
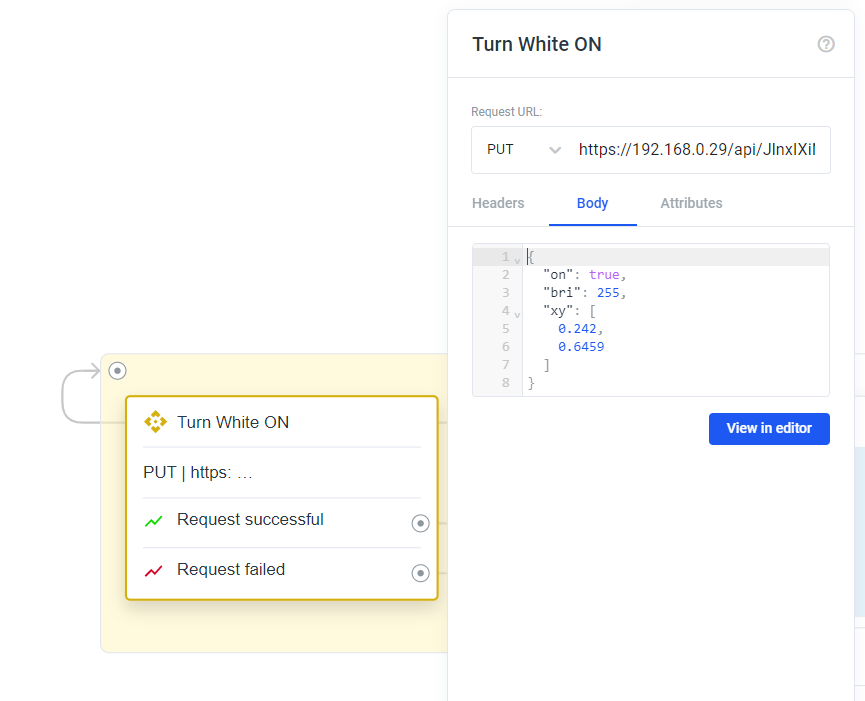
Create a “Custom API” element and connect it in your workflow. Enter the following values (make sure that the number of the light you want to control is correct):
Request URL: https://<bridge ip address>/api/<your new username>/lights/1/state
Body: { “on”: true, “bri”: 255, “xy”: [ 0.242, 0.6459 ] }
Method: PUT
Now update your robot's content, make sure it is on the same network as your Philips Hue bridge, and give it a try!
Please note: If you want your online avatar to control the lighting, make sure you have opened the following address once before using your avatar. https://ip_address_of_your_bridge/api/your_username/lights The browser will tell you that the page is not secure. So click “Accept risk” to prevent your browser from blocking the connection. ATTENTION: Entering the URL alone may not be sufficient. The prefix “https://” will most likely not be added automatically. Please note: If your IP address differs from the local default addresses (192.168...), the system will recognize the IP address as an external address. This causes a problem because the request is sent via a proxy server instead of directly. Therefore, you must either change the local IP address to the default address or create a JavaScript with the “Script Element” to create your own API call element.