You can now personalize your flows to provide a next-level individual experience to your customers. You can do this by passing values for variables in Avatar directly as URL parameters. This may sound hard but is actually easy to do. We will walk you through how to do it in this brief example that will show you how to personalize your flow with the names of your customer so that you can e.g. use it for a mass email/newsletter.
Note: "Avatars" are consuming GOs. If you do not have GOs active in your account please reach out to your corresponding contact person at Humanizing Technologies.
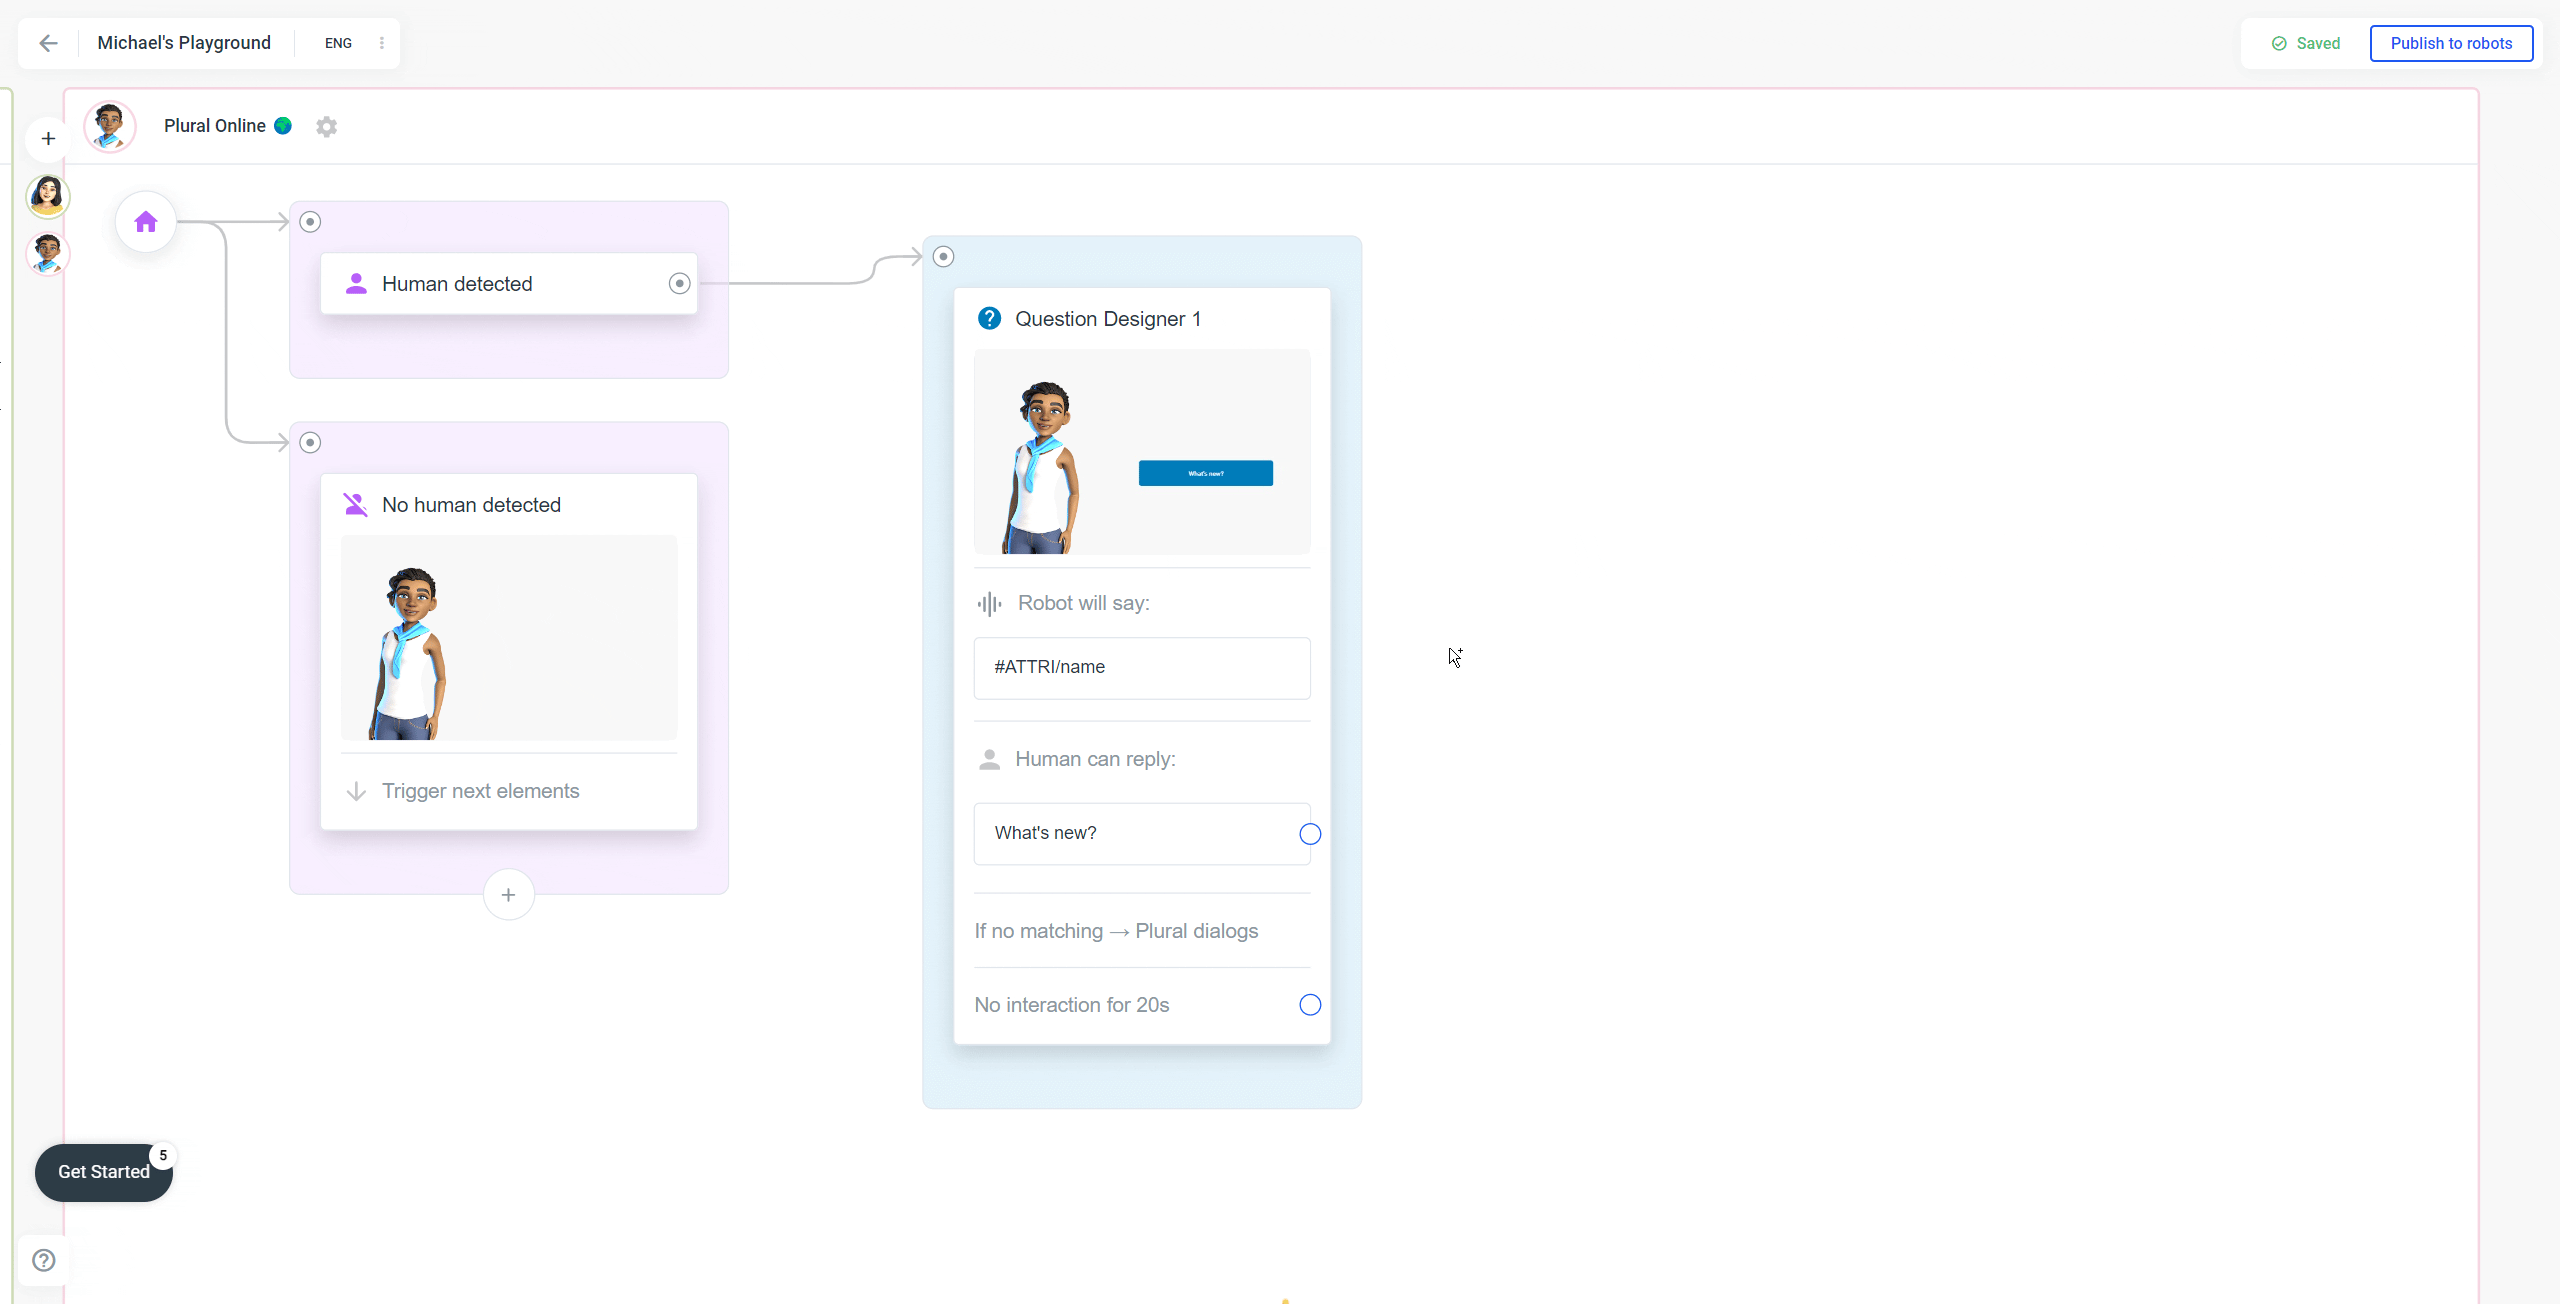
Step 1: Create a user attribute in your Avatar flow
-
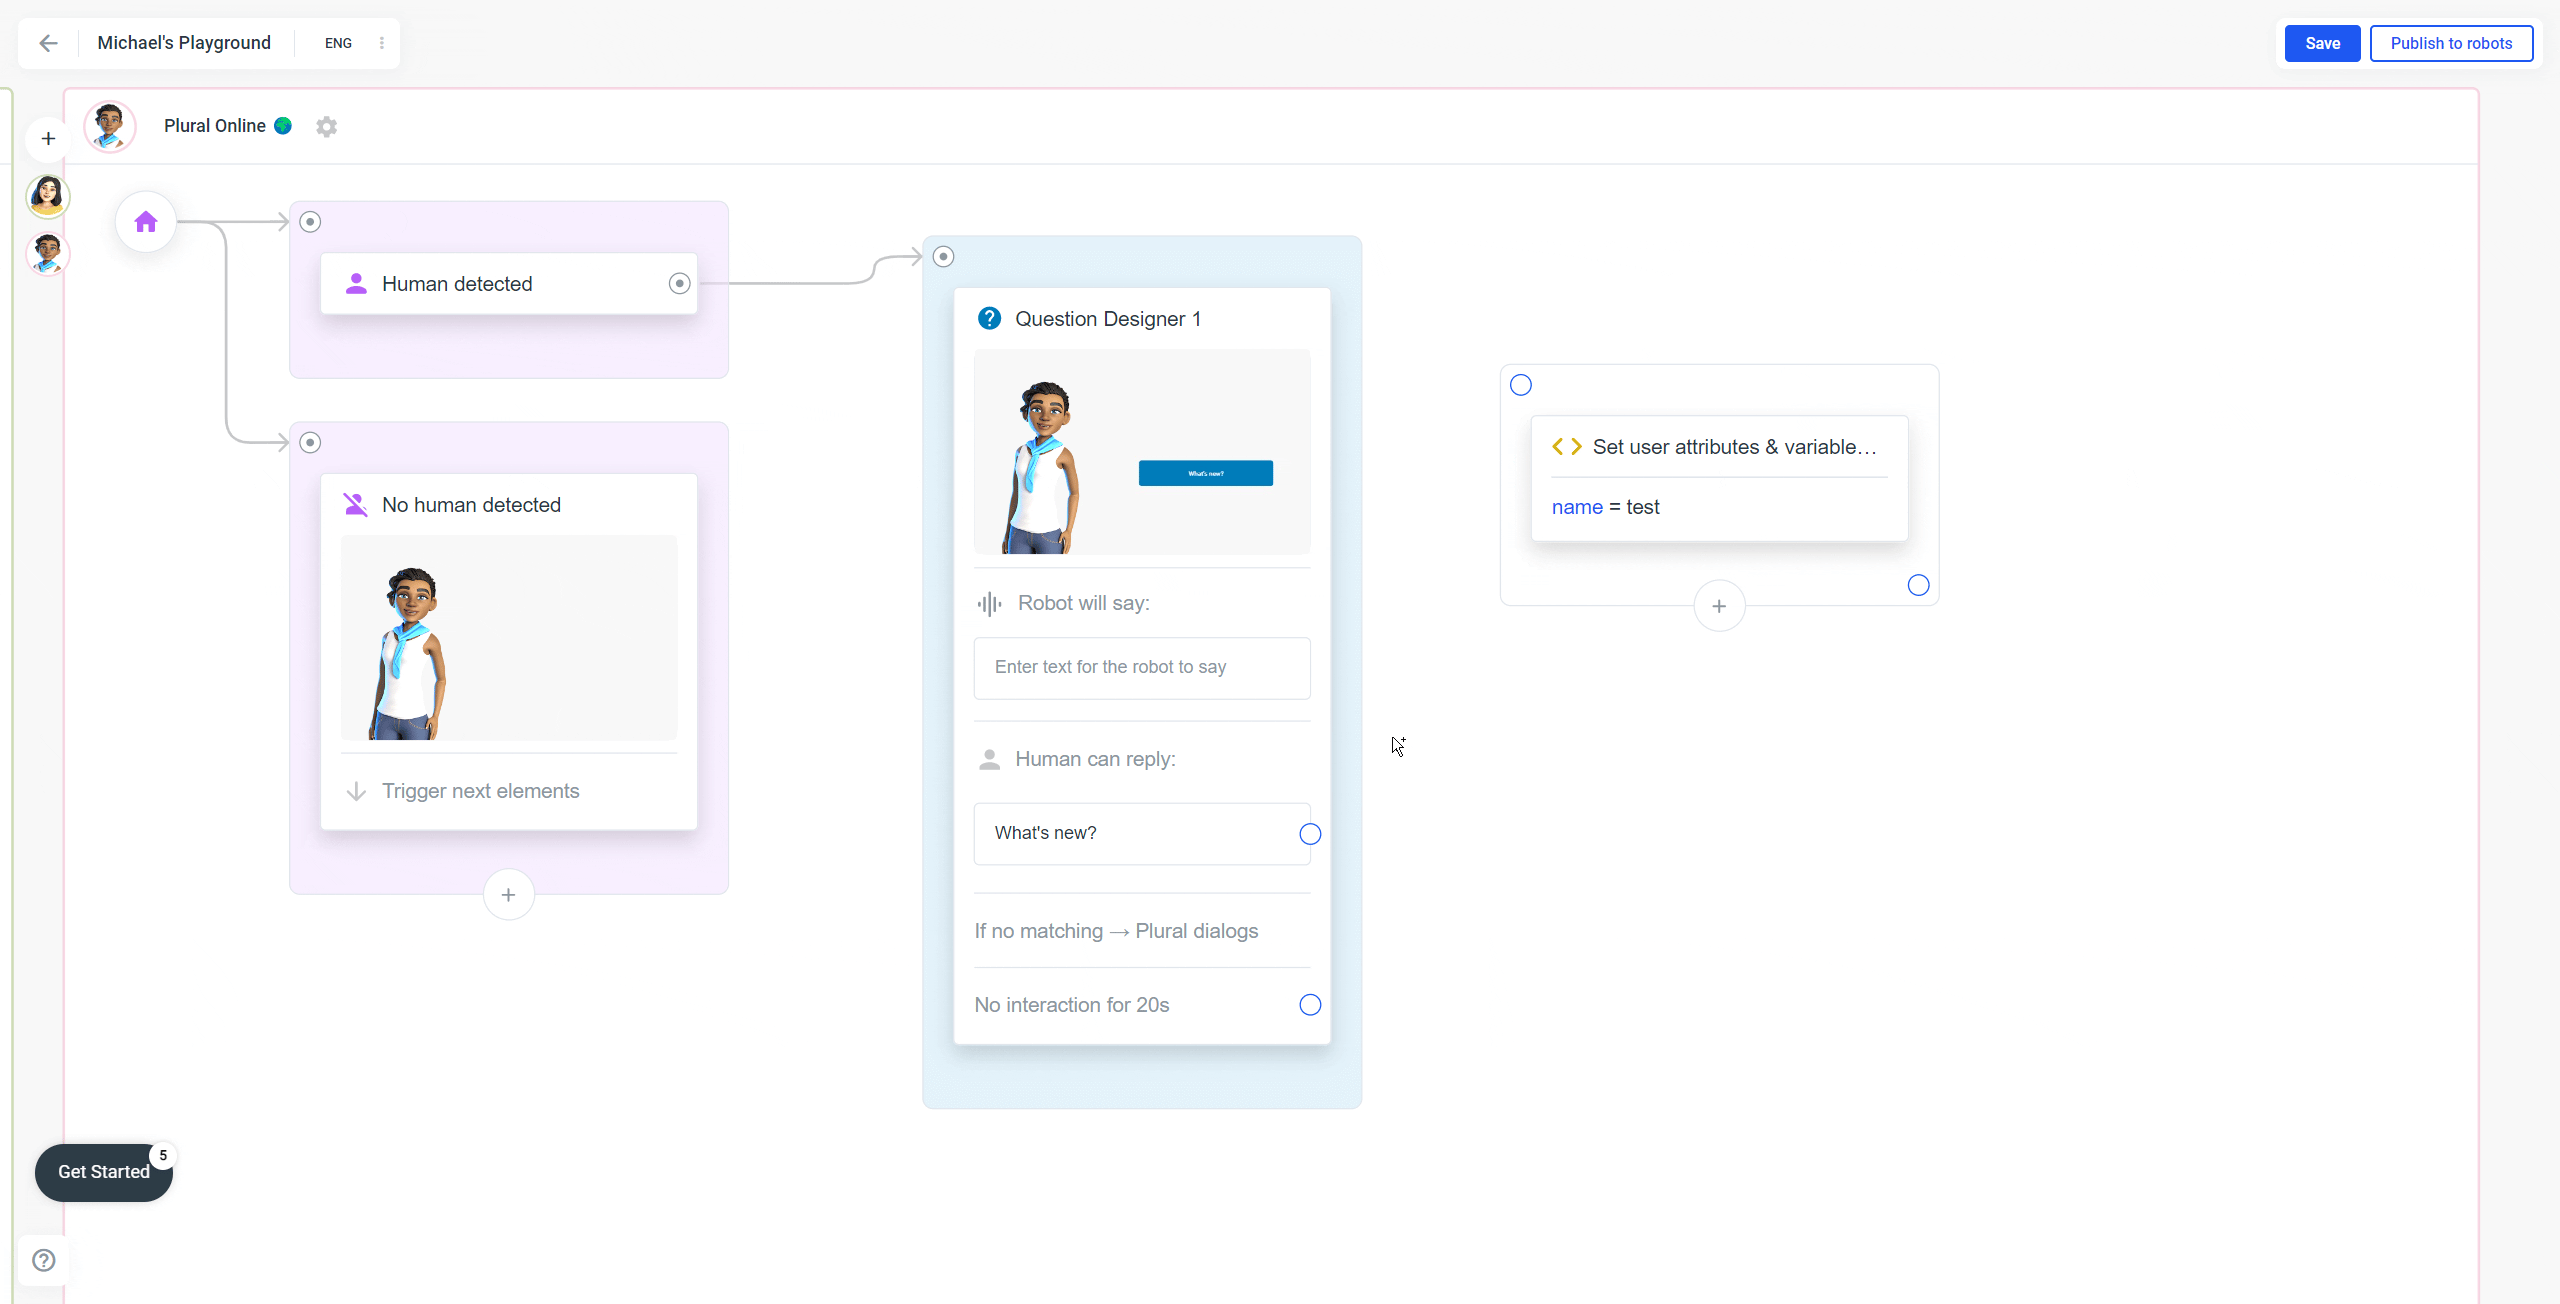
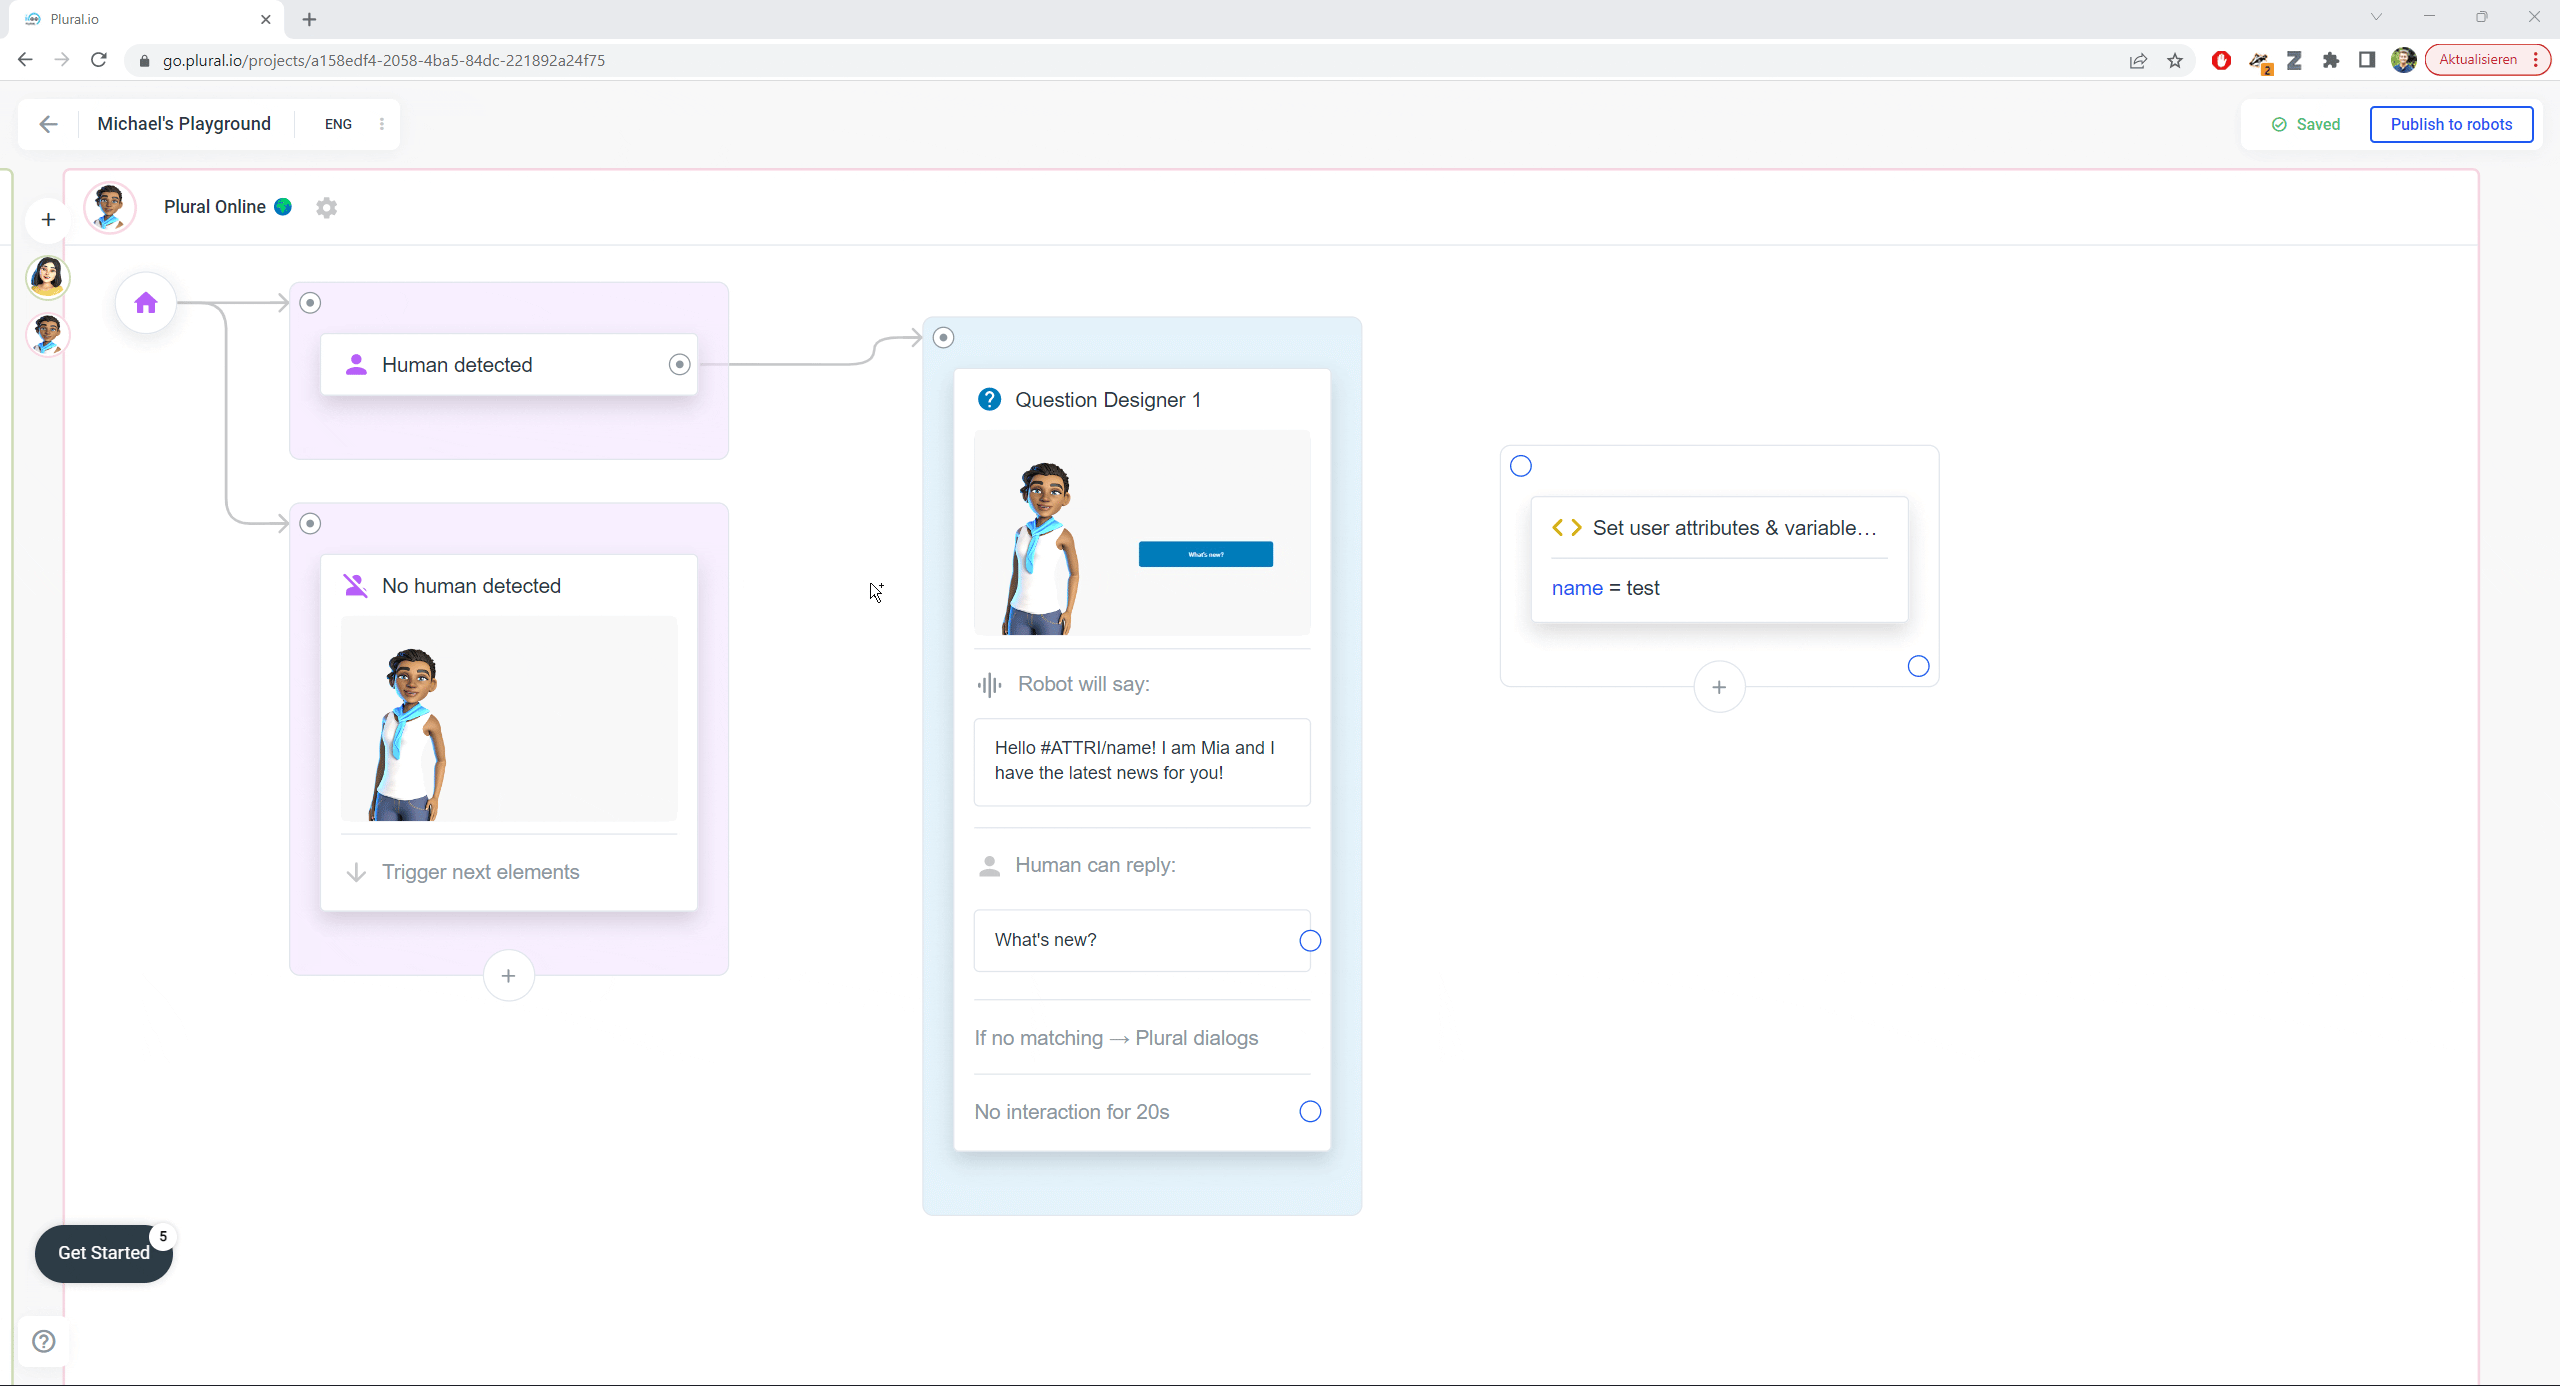
Open your flow in Avatar and add a "Set user attributes & variables" element.
-
Add a variable called "name".
-
Assign it any value.
-
Click on "Save".
Open your flow in Plural Online and add a "Set user attributes & variables" element.
Step 2: Use the attribute somewhere in a text
-
Click into the Question Designer at the start.
-
Add the following text to the "Robot says" field of that element. Hello #ATTRI/name! I am Mia and I have the latest news for you!
-
Click on "Save".
With the Shortcode #ATTRI/variableName you can make your Plural Online Avatar speak out the value of the variable. In our case the name of the customer.
Add the intro text with the shortcode #ATTRI/name.
Step 3: Add the URL parameter to your Avatar link
-
Click on the settings icon of your Avatar.
-
Click on "Preview in browser". A new tab will open.
-
In the URL bar you can see the link to your Avatar.
-
Add "?name=Michael" (or replace with your own name) to the end of the URL.
-
If you follow this new link, the Avatar will now greet you with "Hello Michael! I am Mia...".
-
There you go, a personalized Avatar flow.
If you want to pass multiple variables in the URL bar you can just add more variables by chaining them with a "&" symbol. (e.g. https://go.plural.io/s/e6bb7519db?name=Michael&month=October)
Personalize your flow by adding URL parameters.
Note: for this to work you have to add the attribute/variable inside a "Set user attributes & variables" box inside your flow. Even if this box is not connected to anything as in our example.
Step 4: Make this work with Hubspot
Here's a short explanation on how to make this work for newsletters in Hubspots. The goal here is to send a newsletter to X contacts and every contact gets a "personalized link" meaning that (with our example from above) the Avatar would greet each of the customers with their first name. For the following example we will use the first & last name of your customers.
In Plural:
-
Create two variables (firstname & lastname) in Plural.io and use them in yourflow.
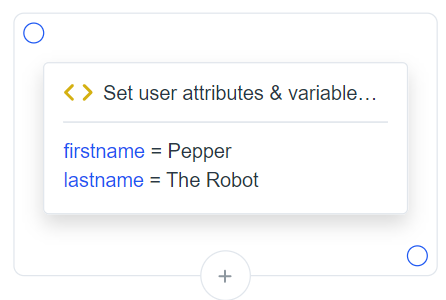
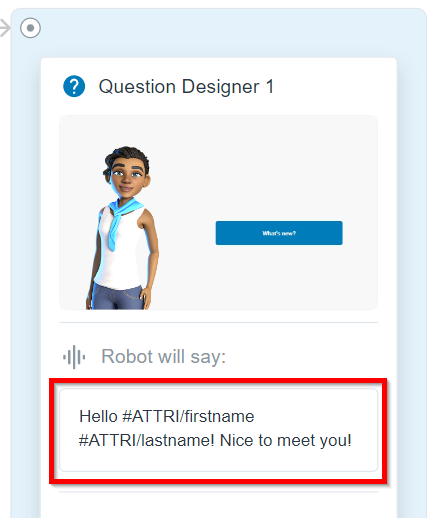
- In the "Robot says" field of your first element use the corresponding shortcodes: Hello #ATTRI/firstname #ATTRI/lastname! Nice to meet you!
-
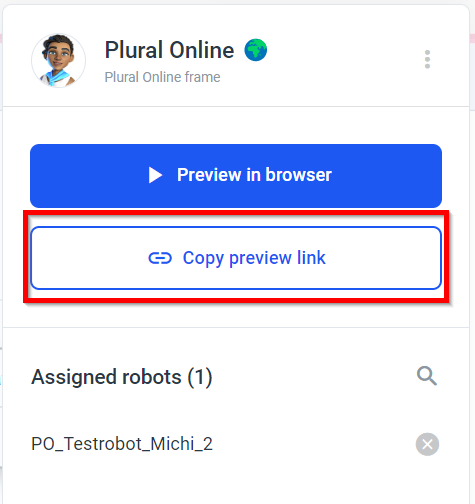
Copy the link to your Plural Online Avatar.
In Hubspot:
-
Create a marketing mail e.g. in Hubspot
-
Decide which variables you need in your avatar flow. In this example, we use the firstname and the lastname.
-
Get the properties’ names (there maybe differences depending on the application you use for creating your newsletters). In Hubspot they are (who would’ve guessed it) “firstname” and “lastname”. So to use them inside the link you would need to write and at the corresponding places.
-
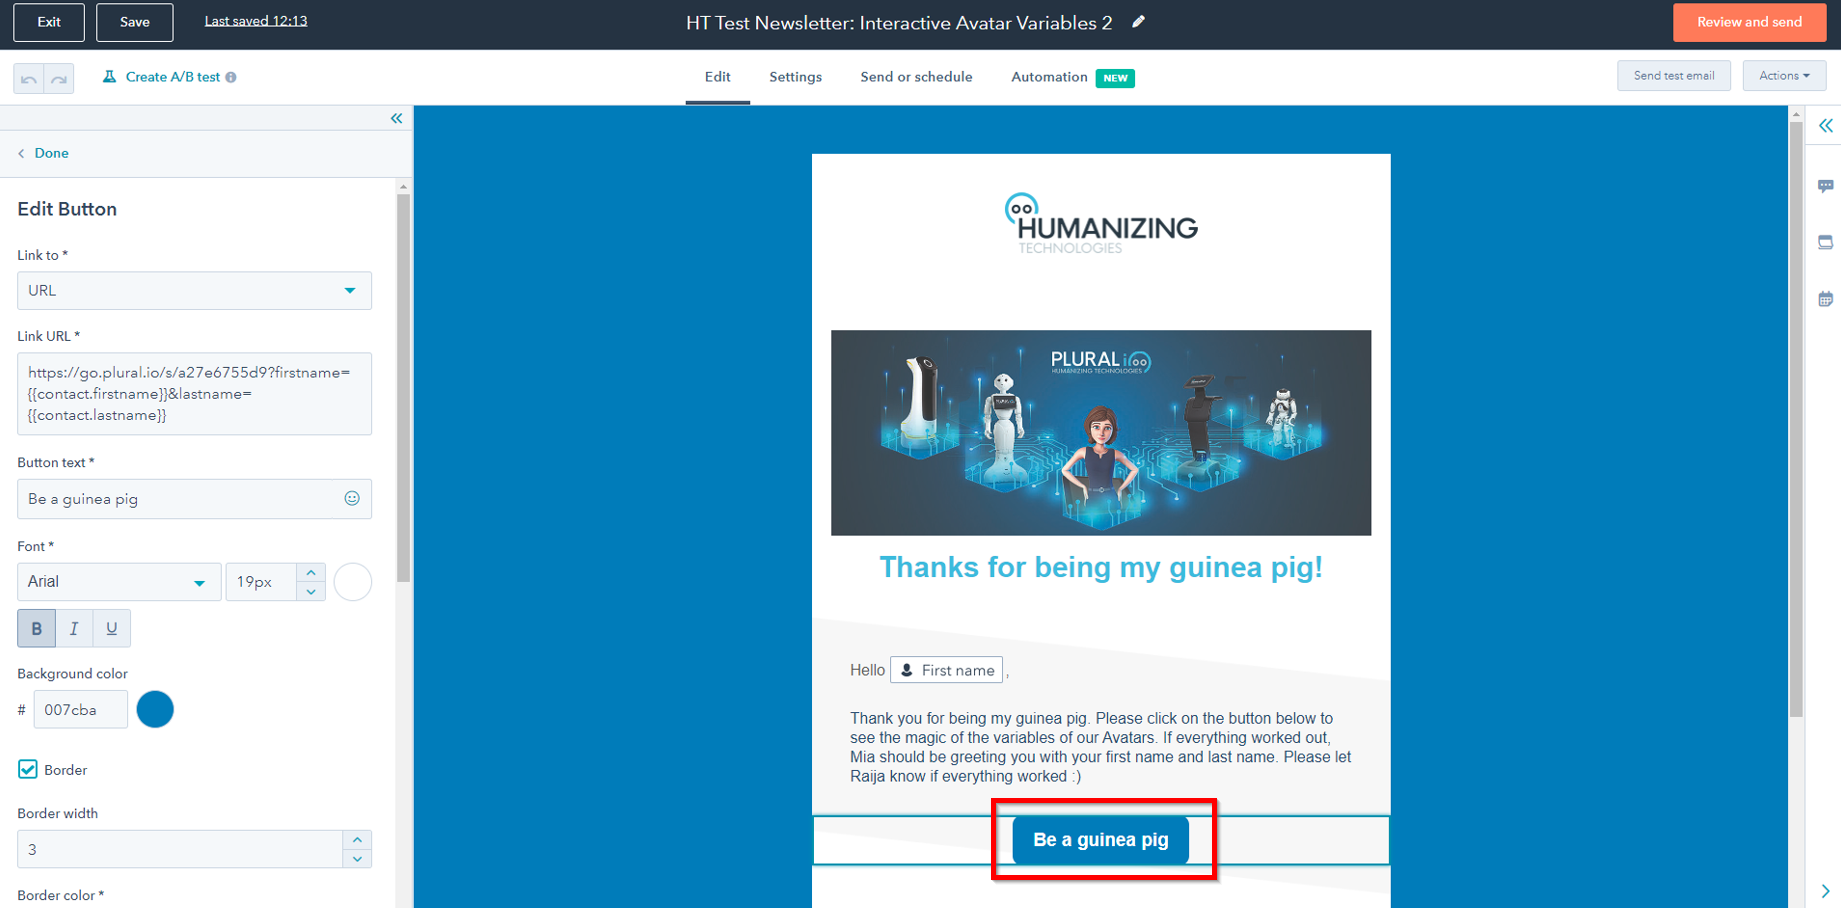
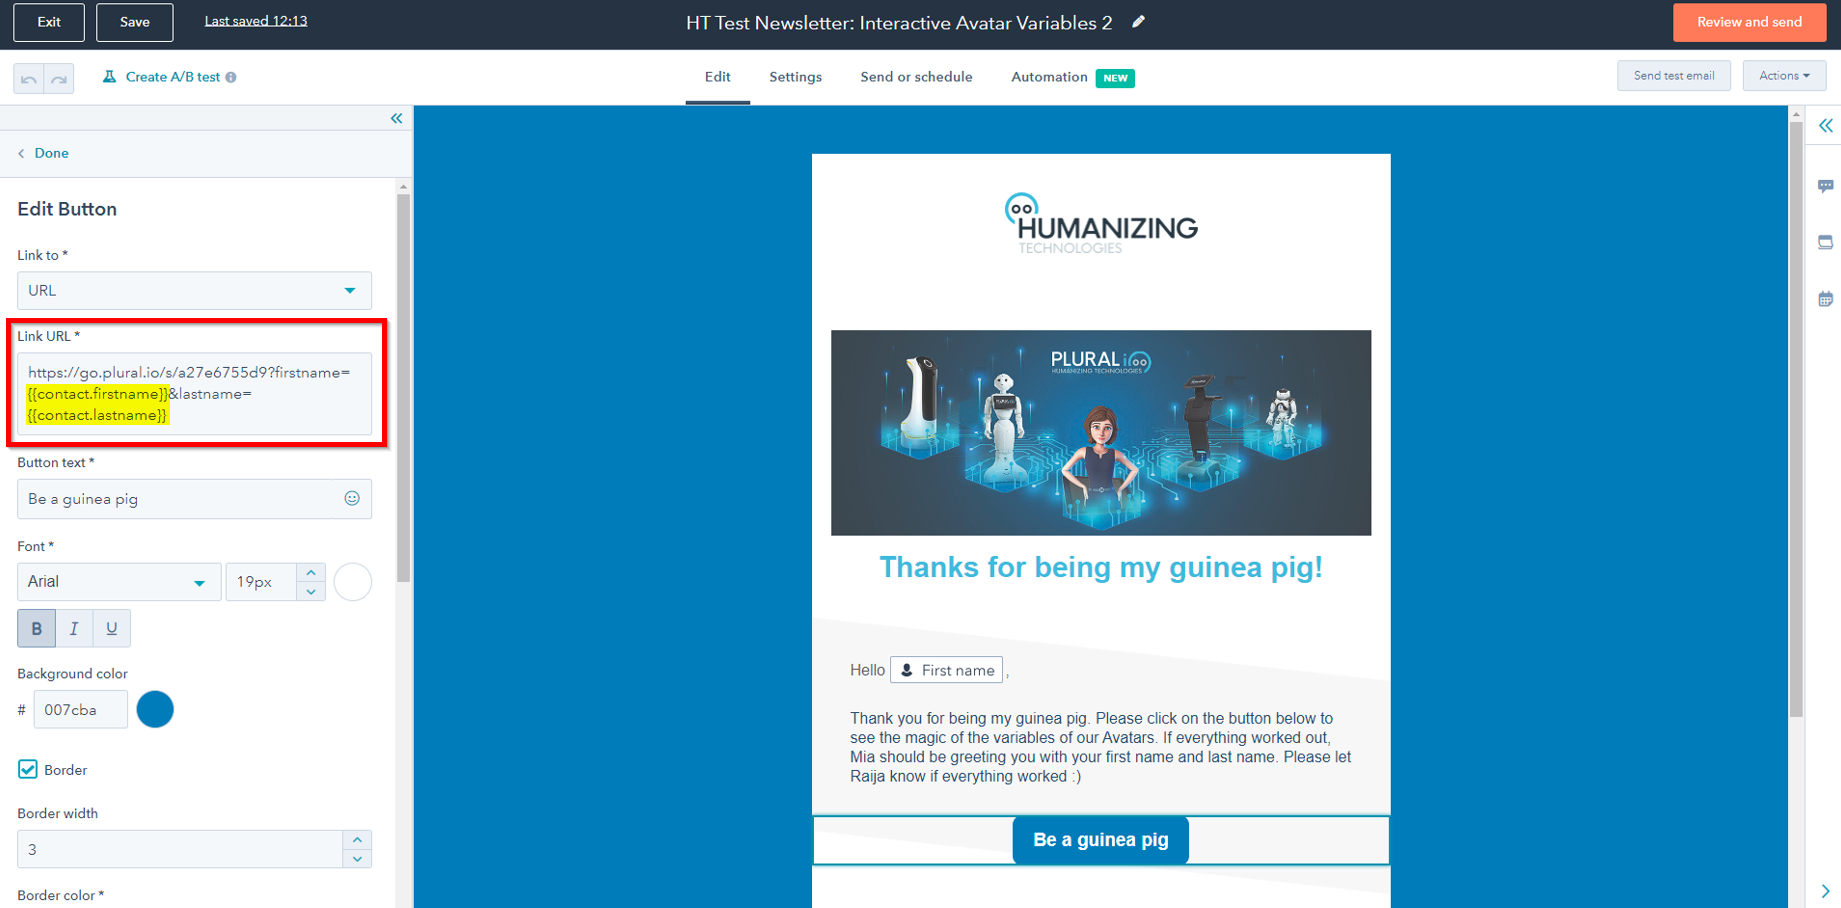
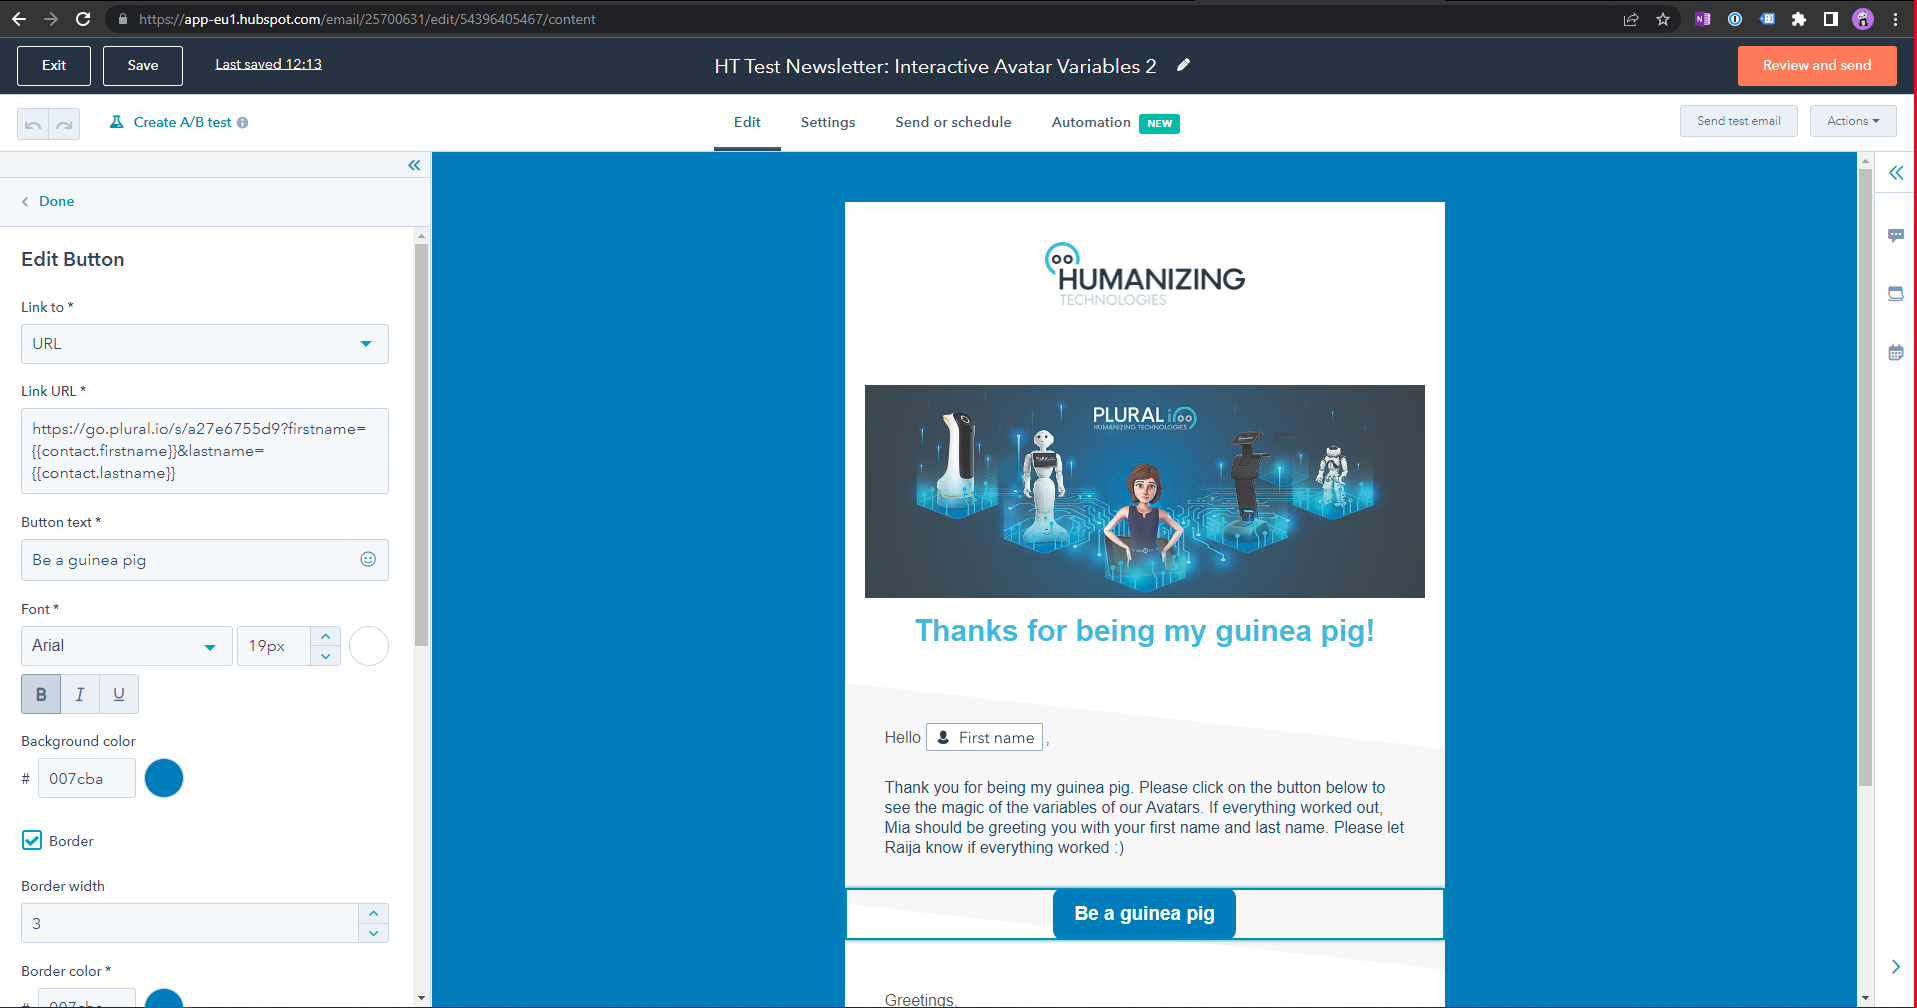
Integrate the link into your newsletter e.g. via a button.
-
In the section of the "Link URL" paste your preview link from Plural.
-
Add the Hubspot properties as described in "3." as parameters to your URL. In our example you would have to add ?firstname=&lastname= to the end of your preview link from Plural.
Here is how my complete flow and my Hubspot email looks like when I'm finished and everything is working.
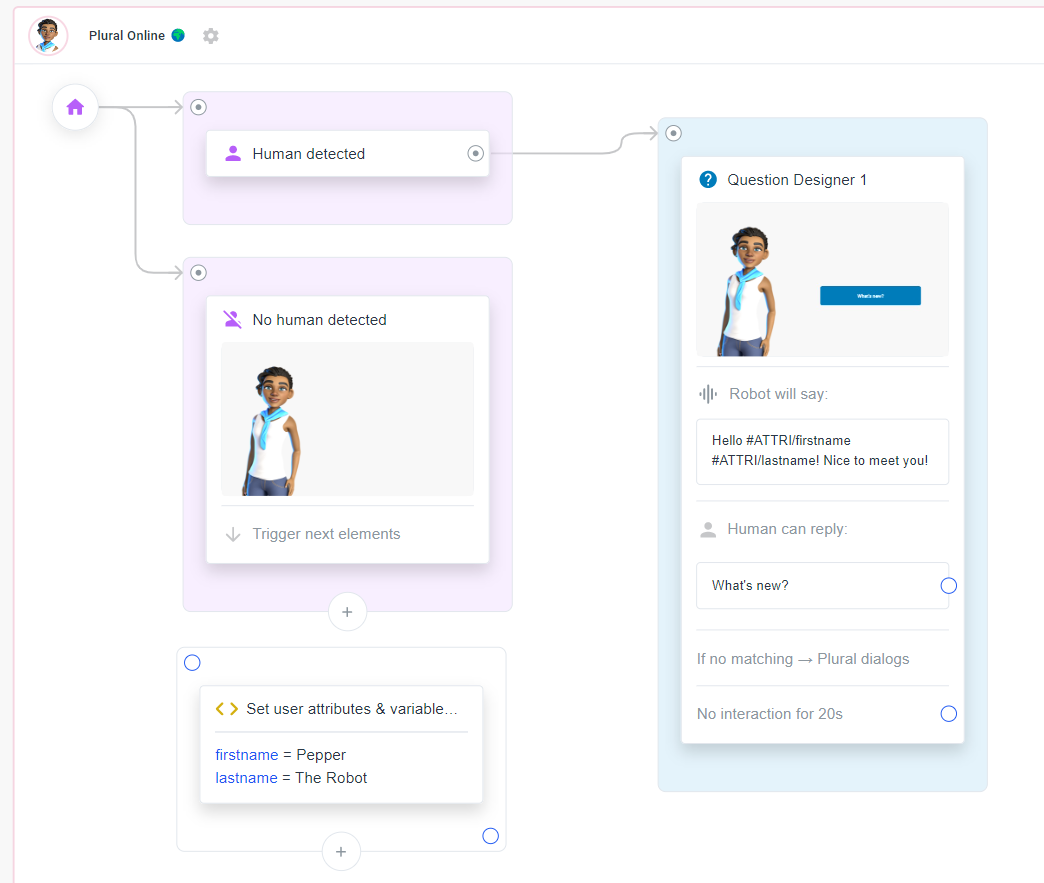
The complete flow of this example (Step 4).
.png)
The marketing email in Hubspot with all the important settings.