Chatbot Connector
Take the communication between the user and your robot/avatar to the next level with a chatbot that works in the background and provides the answers for the avatar/robot.
You don't have a chatbot yet? Jump to the next chapter Dialogflow, here we will give you a short introduction on how to set up a chatbot with Dialogflow.
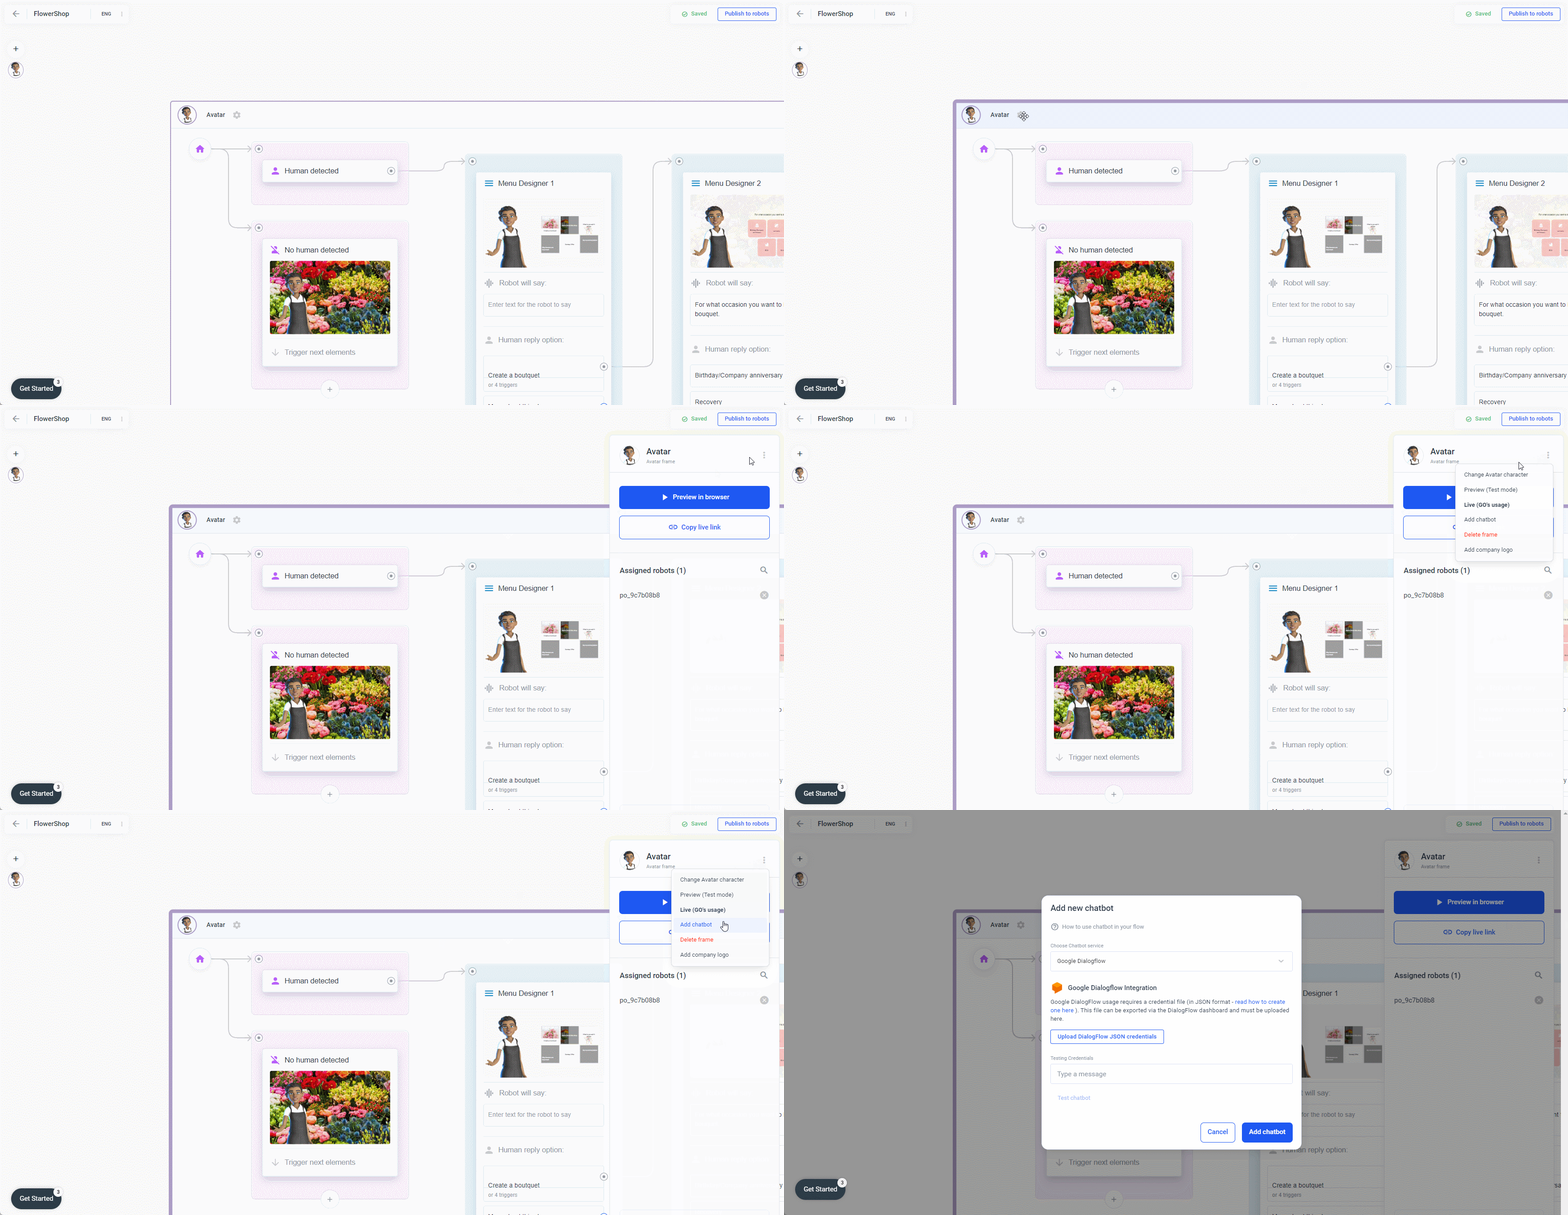
Click the gear icon in the upper left corner of the Robot/Avatar frame. Now a sidebar will open. Here, click on the three dots and select Add Chatbot. Now select the chatbot you want to add from the list. Upload the chatbot credentials in JSON format (the chatbot credentials you export from your chatbot).

To use Google Dialogflow, you need to create a service account and private key for the new agent in Google Dialogflow.
Before you begin
Role required: admin
Procedure:
-
On the project dashboard page, click Go to project settings.
-
On the IAM & Admin page, click Service Accounts.
-
Click + Create Service Account.
-
Provide a name, and then click Create and Continue.
-
Under Select a role, select Dialogflow > Dialogflow API Client.
-
Click Continue.
-
Click Done.
- Click the link for the record in the Email column.
- The Service account details page opens.
-
Click the Keys tab.
- Click Add Key > Create new key.
- When prompted for the key type, select JSON, and then click Create. The JSON file is downloaded to your computer.
